
IBM Cloud Manager with OpenStack
Install, deploy and manage your cloud the IBM way.
OpenStack
OpenStack is a free, open-source software platform for cloud computing. It is IaaS (infrastructure as a service) implementation. In simple words, using OpenStack we can offer virtual servers, containers etc to our users as "self-service" resources.
In a typical scenario a user can choose from multiple virtual machine sizing options (like small, medium, large, x-large regarding CPU cores, memory, storage) and "provision" a new virtual server to the cloud as "instance". In order to do that they may choose from Operating Systems pre-installed to volumes named "images". They can also do that for multiple servers with connectivity options creating a "stack".
OpenStack is the layer that can describe possible environments and working with all hypervisor types, can build and offer them to end users ready for services installation.
What IBM is offering
IBM Cloud Manager is an easy way to install, deploy and manage OpenStack. You can choose from different topologies depending on your needs and your existing environments. You can setup integration with your -on premisses- hypervisors like PowerVC, PowerKVM, x86 Linux Kernel-based Virtual Machine (KVM) and QEMU, VMware, Hyper-V and z/VM. You can also setup integration with -public- clouds based on openstack.
You can do all these from a simple web interface with some restrictions or from a command line interface without topology or hardware (hypervisor-type) restrictions. Either way a bunch of chef cookbooks is generated by the software to implement OpenStack deployment customized to fit to your own needs.
We will present here the product installation and a basic topology deployment of OpenStack managing a single vmware environment.
Installing ICM with OpenStack
We begin spining up a redhat 7.4 (7.3 is supported by the current fix pack level but there wasn't any problem with 7.4) linux server (basic installation without UI). 8GB of memory are required.
We could install the product following the documentation provided by IBM line by line. Because it has been several years since the 80's we will just use Ansible to standardize and execute the full installation procedure.
So we created "ansible" user with our ssh key in his profile in order to login without password:
$ ssh-copy-id ansible@my-redhat-server
We also gave him sudo rights without password via the following visudo line:
Next we need to execute in order:
- Product prequisites
- Product installation (quitely)
- Product patching to the latest fix pack level, currently 4.3.0.8 (quitely)
The ansible playbook is self-explaned by reading the "name" of every task:
icm-install.yml
- hosts: ICM-SERVER
  vars:
    fqdn: icmsrv.epilis.gr
    pckg_path: "/opt/ansible/binaries"
    product_binary: "cloud_mgr_4.3_x86_rhel_1.tar.gz"
    product_fp: "cmwo_fixpack_4.3.0.8.tar.gz"
  remote_user: ansible
  tasks:
  - name: "Set fqdn as server's hostname"
    hostname:
      name: "{{ fqdn }}"
    become: yes
  - name: "Set timezone to Europe/Athens"
    timezone:
      name: Europe/Athens
    become: yes
  - name: "Mount RHEL DVD"
    mount:
      path: /mnt
      src: /dev/sr0
      fstype: iso9660
      opts: "ro,relatime"
      state: mounted
    become: yes
  - name: "Add DVD as yum repository"
    yum_repository:
      name: InstallMedia
      description: Red Hat Enterprise Linux 7.4
      file: rhel74dvd
      baseurl: "file:///mnt/"
      gpgkey: "file:///etc/pki/rpm-gpg/RPM-GPG-KEY-redhat-release"
      gpgcheck: yes
      enabled: yes
      cost: 500
    become: yes
  - name: "Clean yum repositories"
    command: yum clean metadata
    args:
      warn: no
  - name: "Copy extra RPM dependencies to server"
    copy:
      src: "{{ item }}"
      dest: "/home/ansible"
    with_items:
      - "{{ pckg_path }}/python-zope-interface-4.0.5-4.el7.x86_64.rpm"
      - "{{ pckg_path }}/python2-pyasn1-0.1.9-7.el7.noarch.rpm"
      - "{{ pckg_path }}/python2-pyasn1-modules-0.1.9-7.el7.noarch.rpm"
    become: yes
  - name: "Install extra RPM dependencies"
    yum:
      name: "{{ item }}"
      state: present
    with_items:
      - "/home/ansible/python-zope-interface-4.0.5-4.el7.x86_64.rpm"
      - "/home/ansible/python2-pyasn1-0.1.9-7.el7.noarch.rpm"
      - "/home/ansible/python2-pyasn1-modules-0.1.9-7.el7.noarch.rpm"
    become: yes
  - name: "Extract installation file"
    unarchive:
      src: "{{ pckg_path }}/{{ product_binary }}"
      dest: /home/ansible
  - name: "Copy rsp file"
    copy:
      src: "{{ pckg_path }}/cmwo-install.rsp"
      dest: "/home/ansible"
  - name: "Execute basic product installation (...ignoring errors)."
    command: "/home/ansible/install/x86-64/linux/cmwo430_xlinux_install.bin -i silent -f /home/ansible/cmwo-install.rsp"
    become: yes
    ignore_errors: True
  - name: "Extract fix pack file"
    unarchive:
      src: "{{ pckg_path }}/{{ product_fp }}"
      dest: /home/ansible
  - name: "Execute fix pack installation"
    command: "/home/ansible/install_cmwo_fixpack.sh"
    become: yes
A couple of comments:
- The file cmwo-install.rsp is needed for silent install. It contains only the line:
LICENSE_ACCEPTED=true - On the basic product installation task we may get a failure (non fatal) due to ntp daemon replaced by chrony. We can just ignore it and continue to fix pack installation.
Assuming that we have our server "ICM-SERVER" in our ansible inventory file, we are just executing:
$ ansible-playbook -i inventory playbooks/icm-install.yml
Then we can deal with something else and come back in about twenty minutes.
Deploying your VMware cloud
The product installation will deliver "IBM Cloud Manager - Deployer" application comming with a powerfull CLI and a simple web UI, both ready to handle our new cloud deployment.
We can access the web UI from the following url and login with the root account:
https://<hostname>:8443/

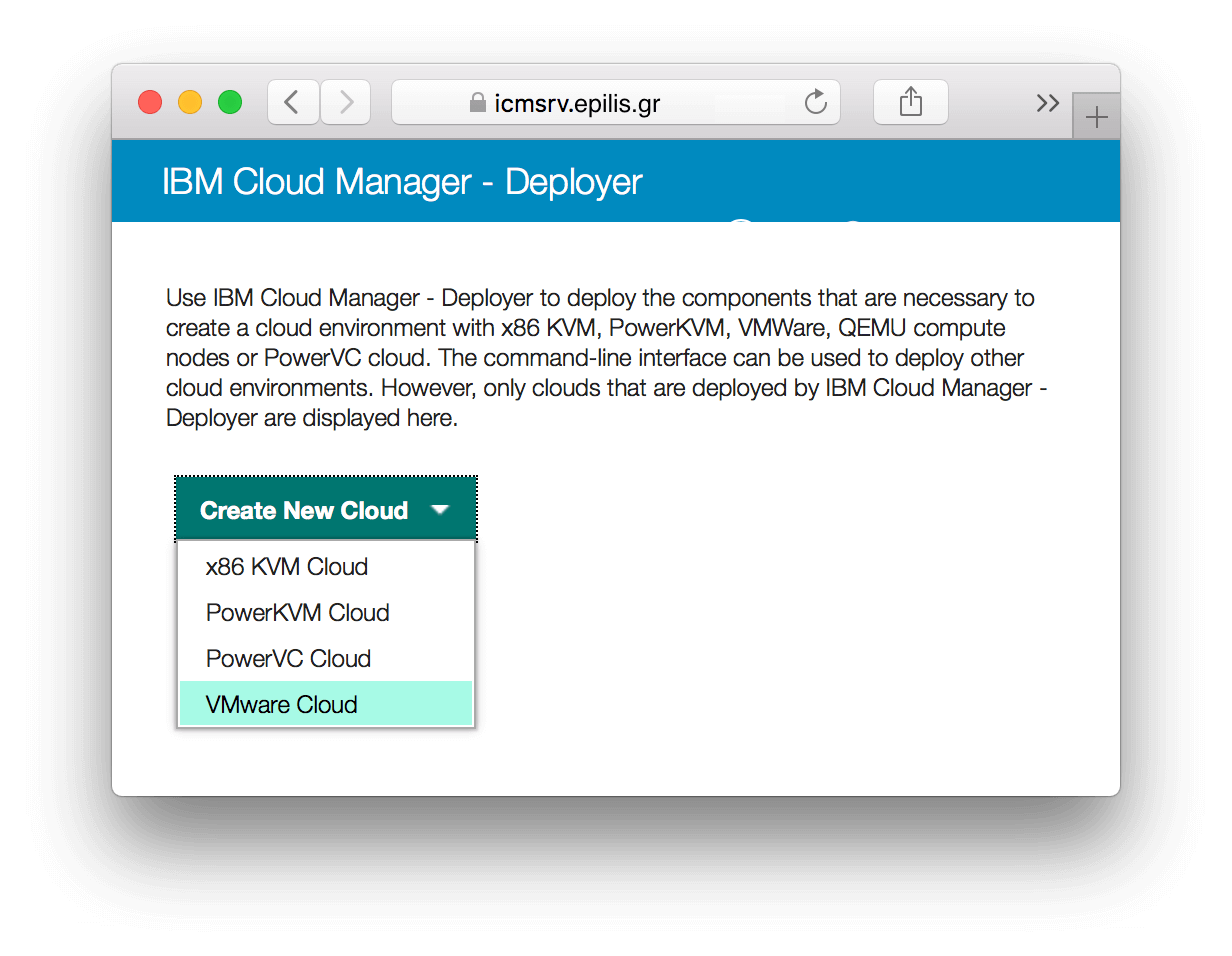
In our case there are already some functional VMware hypervisors (vCenter app) that we need to manage with our cloud.
Otherwise we would select "x86 KVM Cloud" and leave deployer to undertake the installation of the KVM hypervisor on every compute node.
Selecting our Hypervisor type:
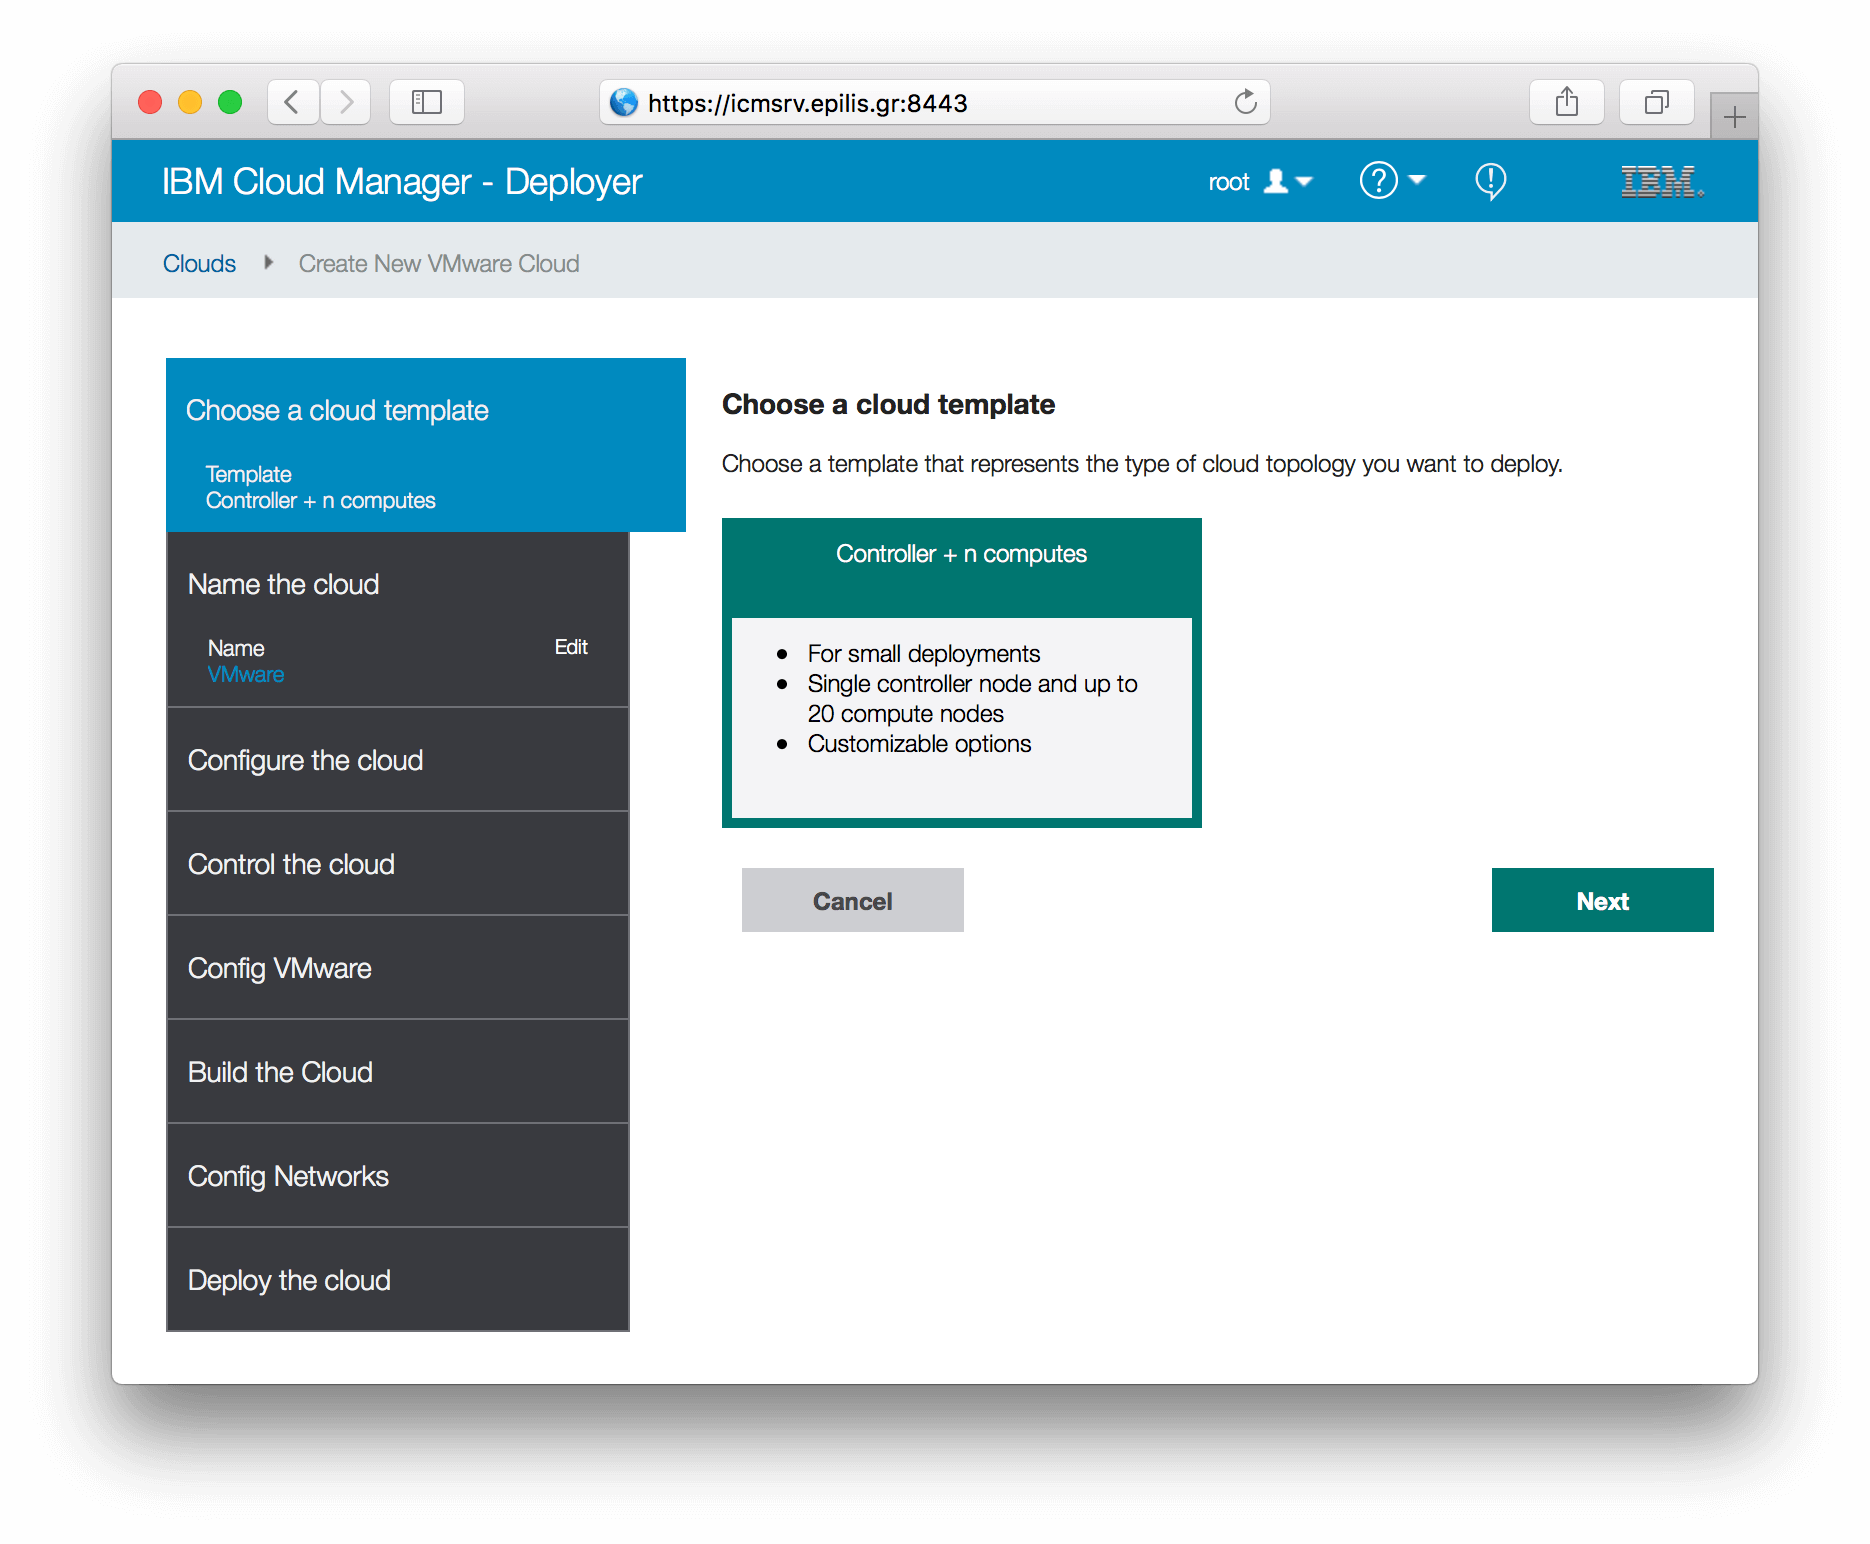
Choosing cloud template (topology):
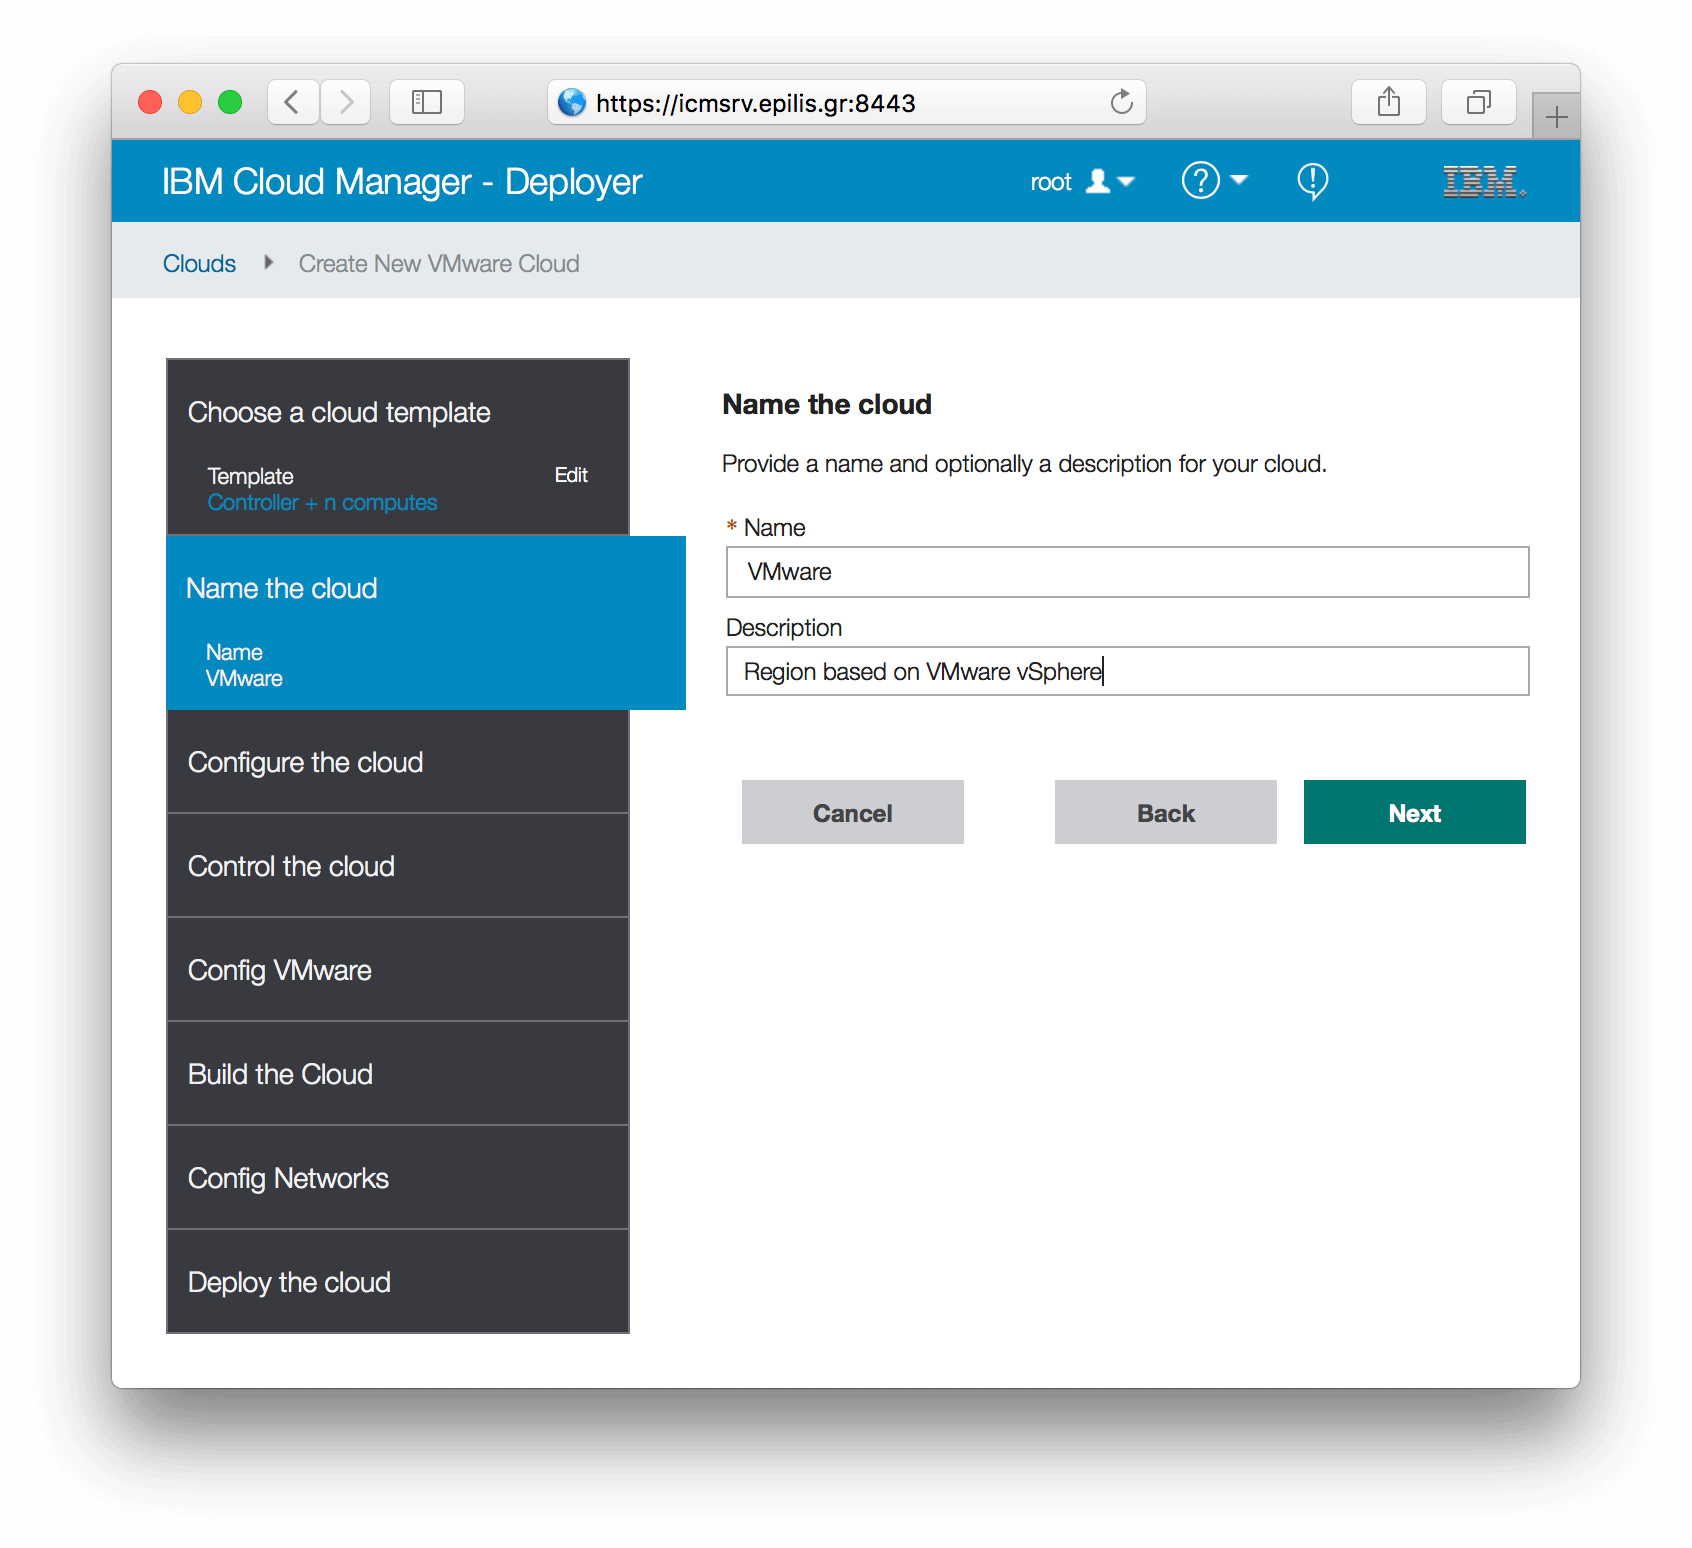
Naming our cloud:
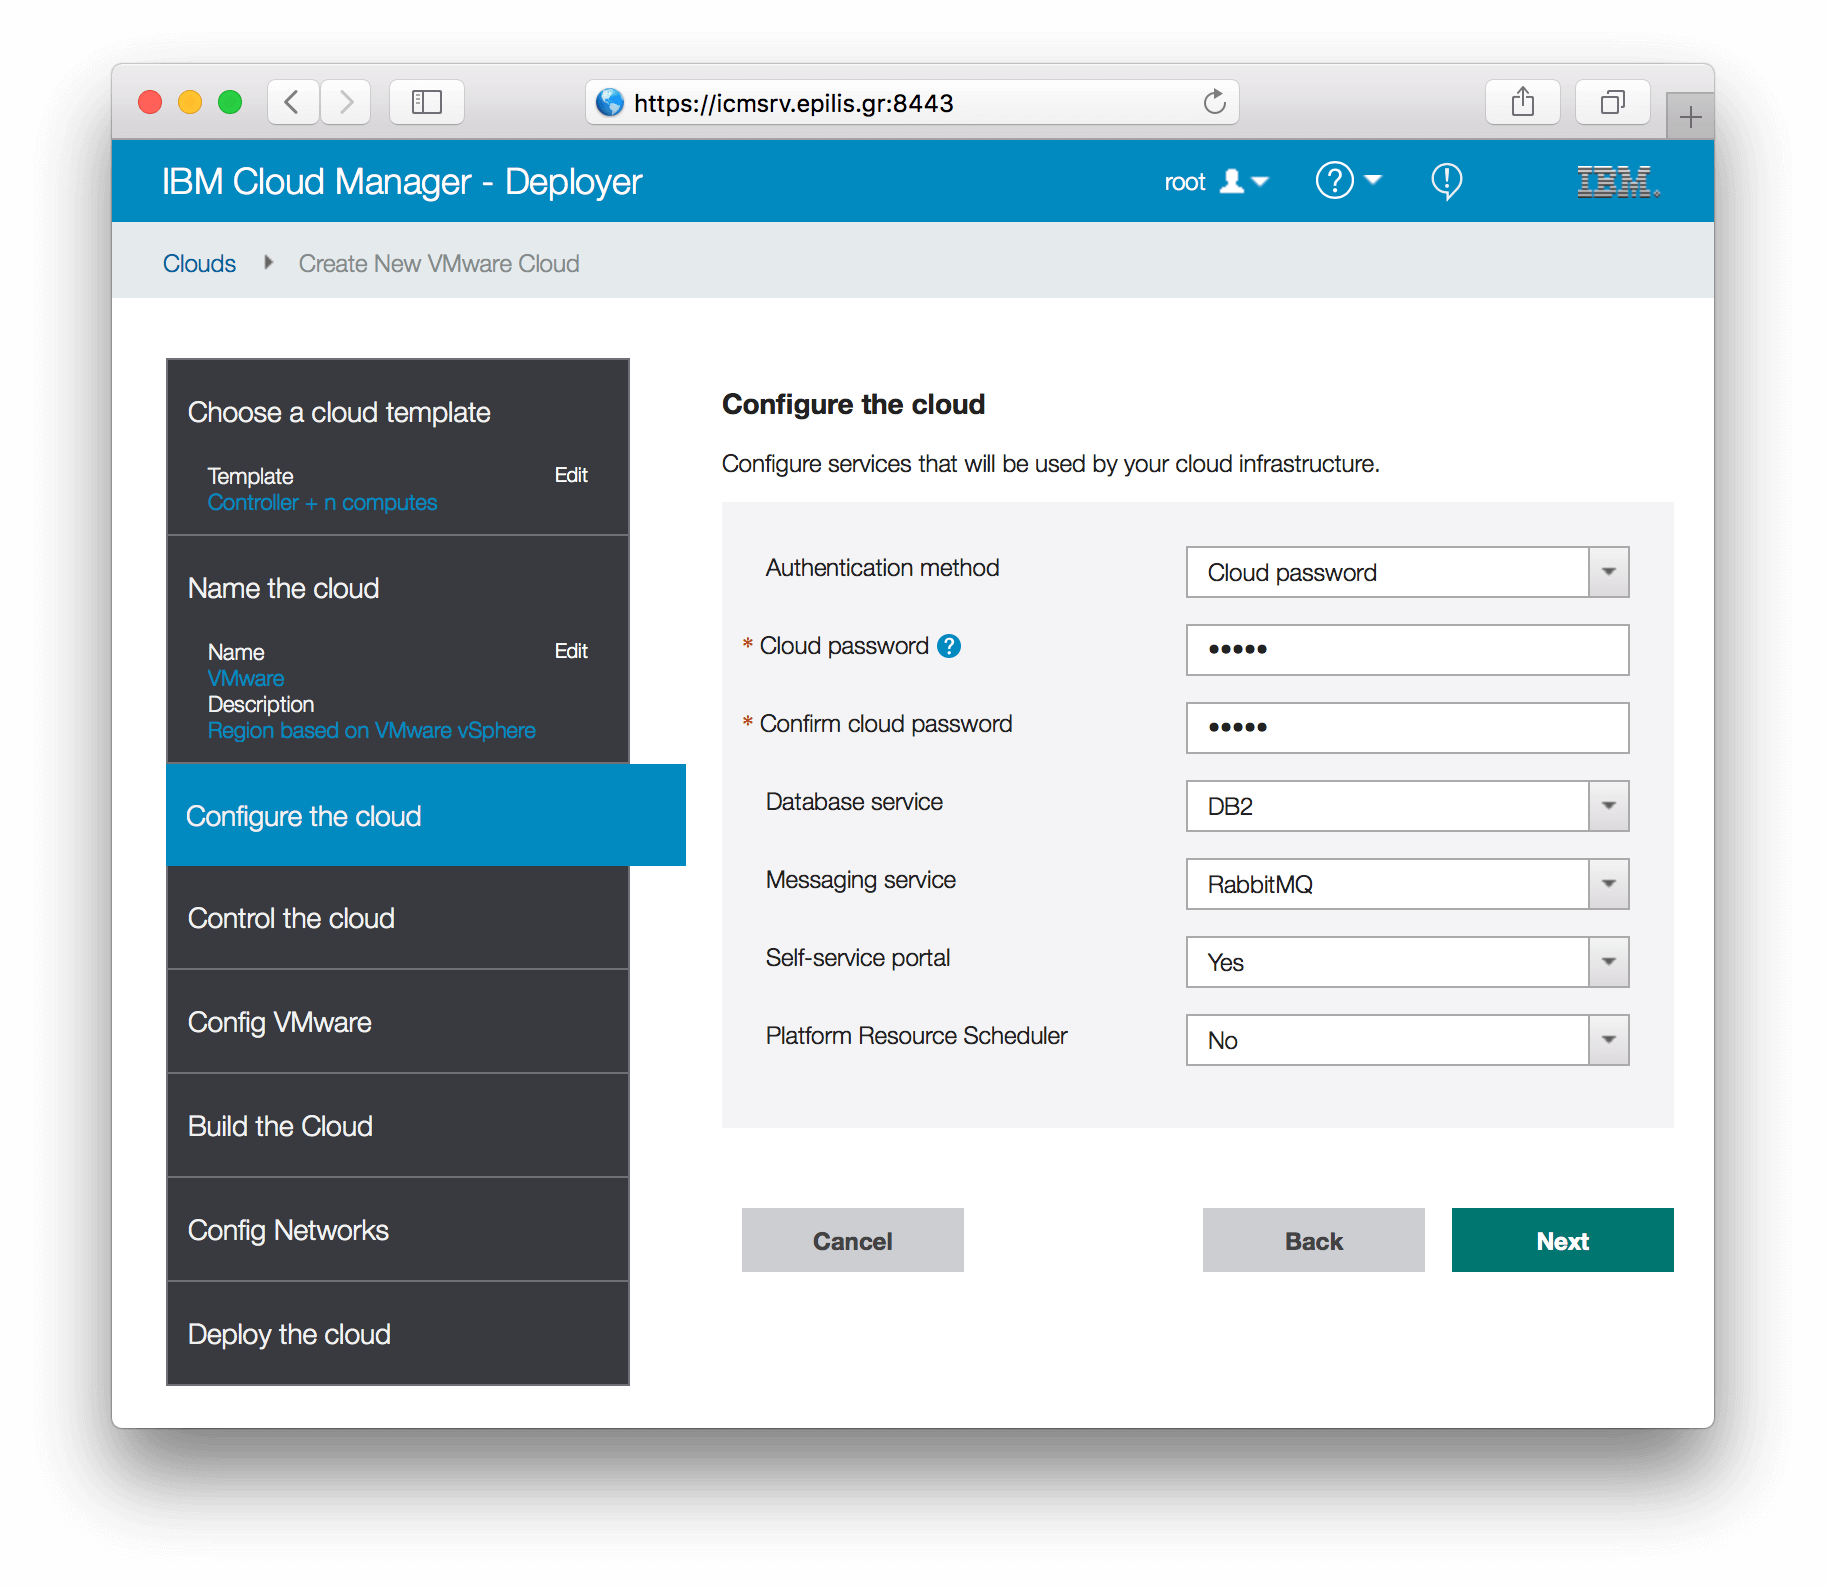
Configuring the cloud services:
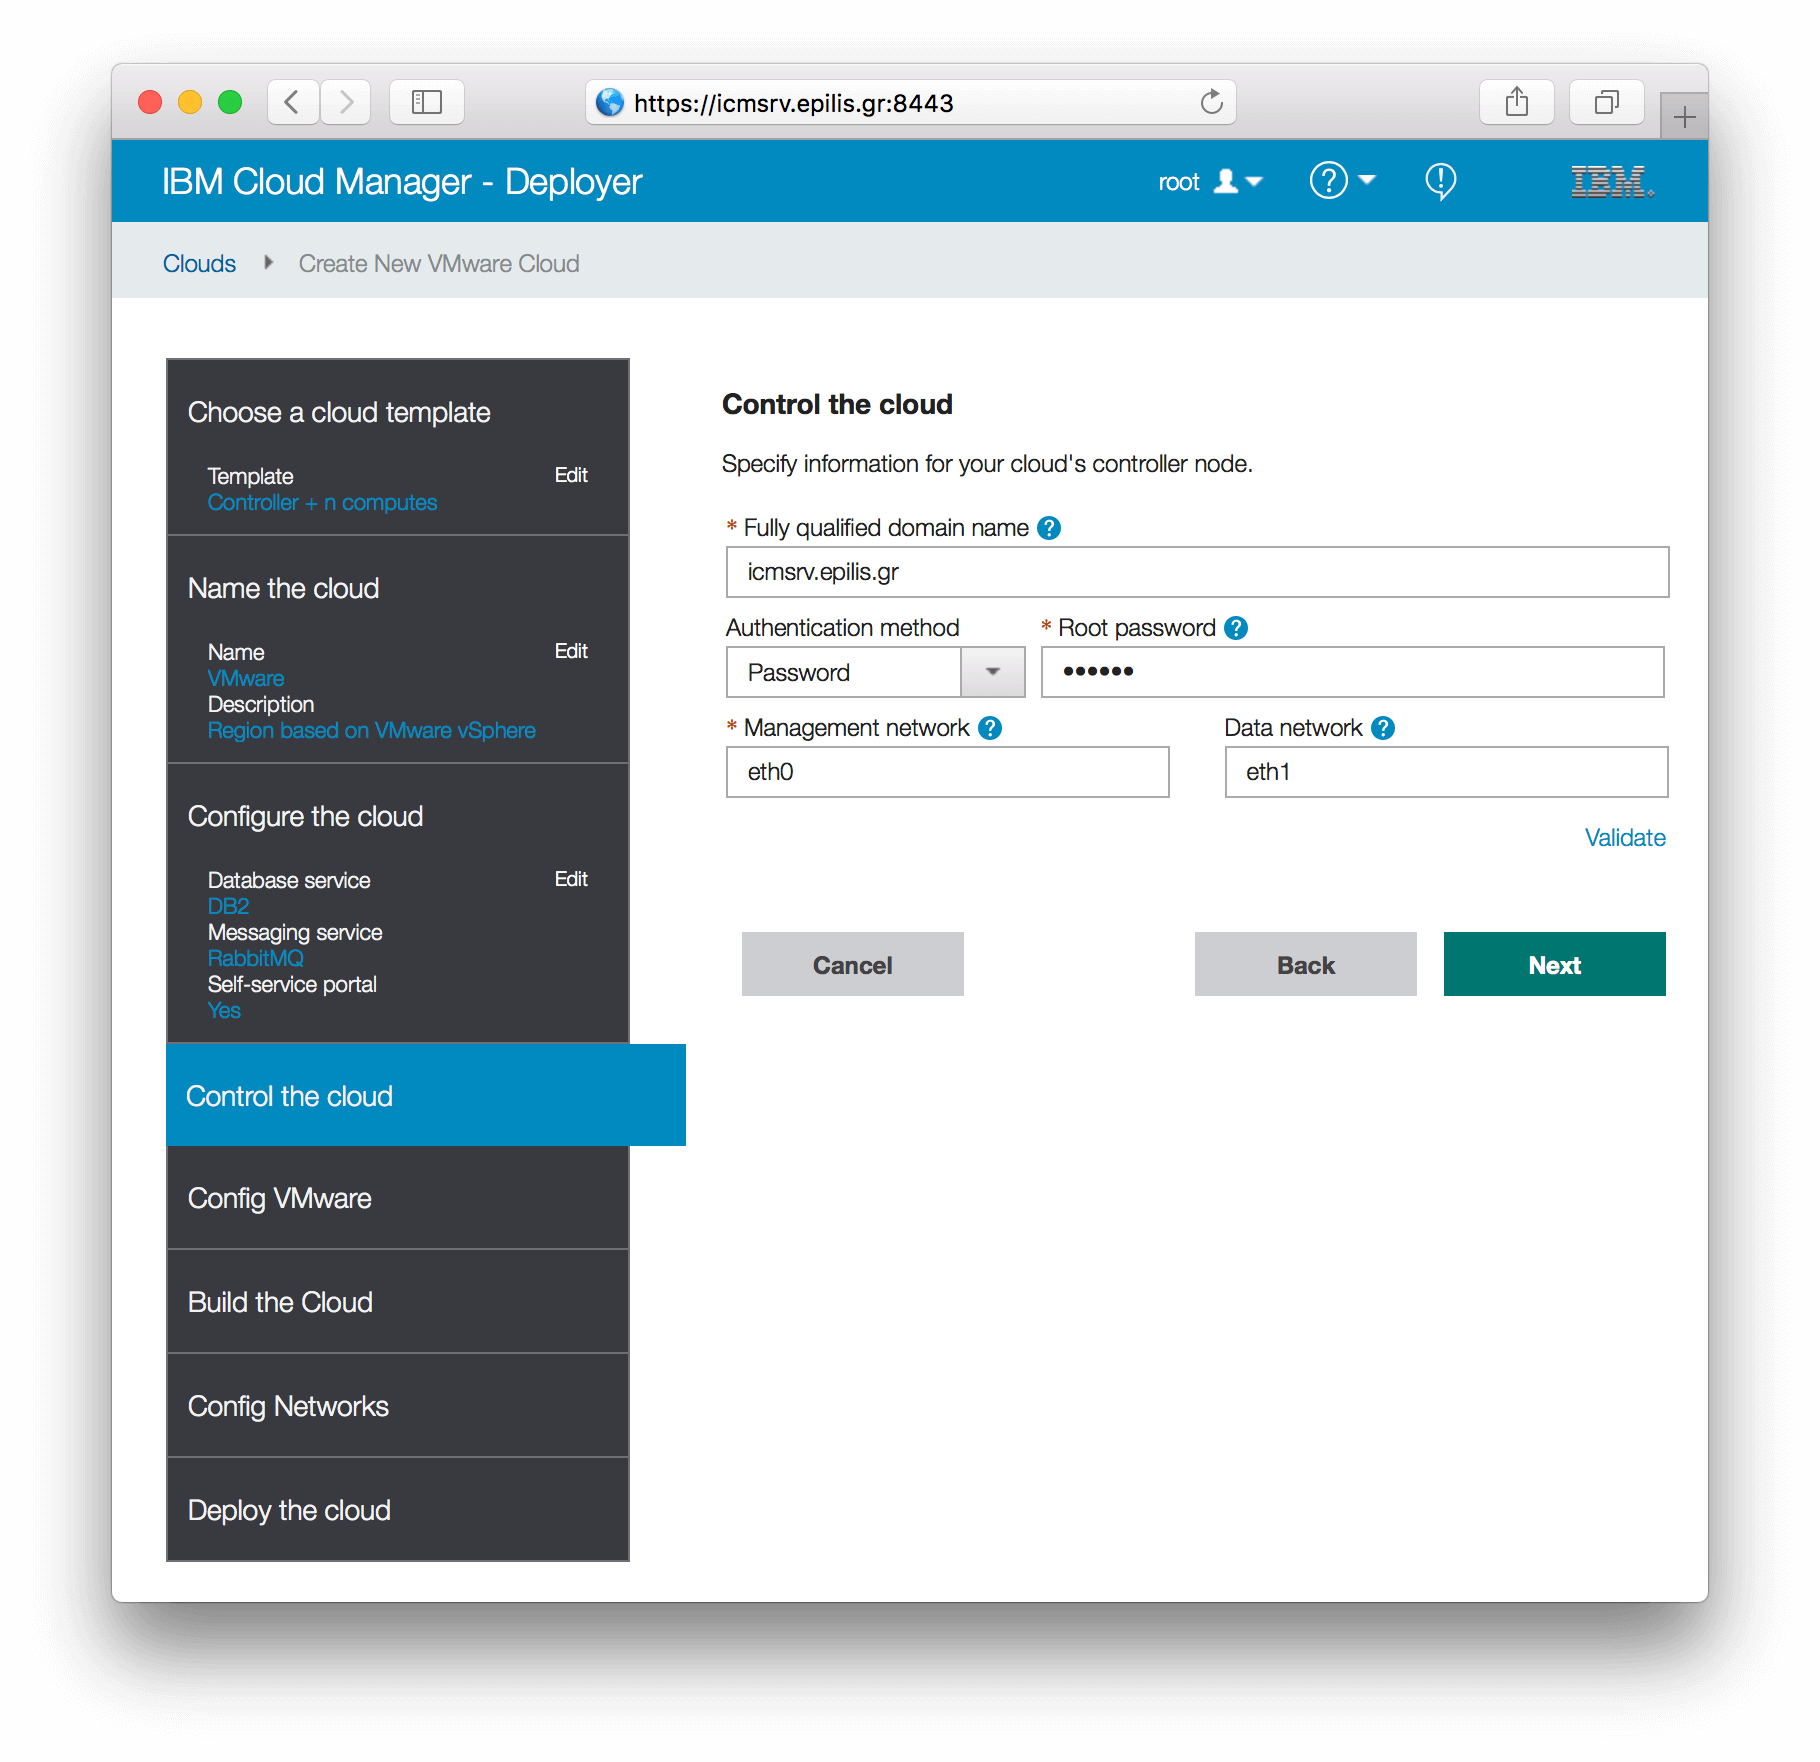
Entering controller's information:
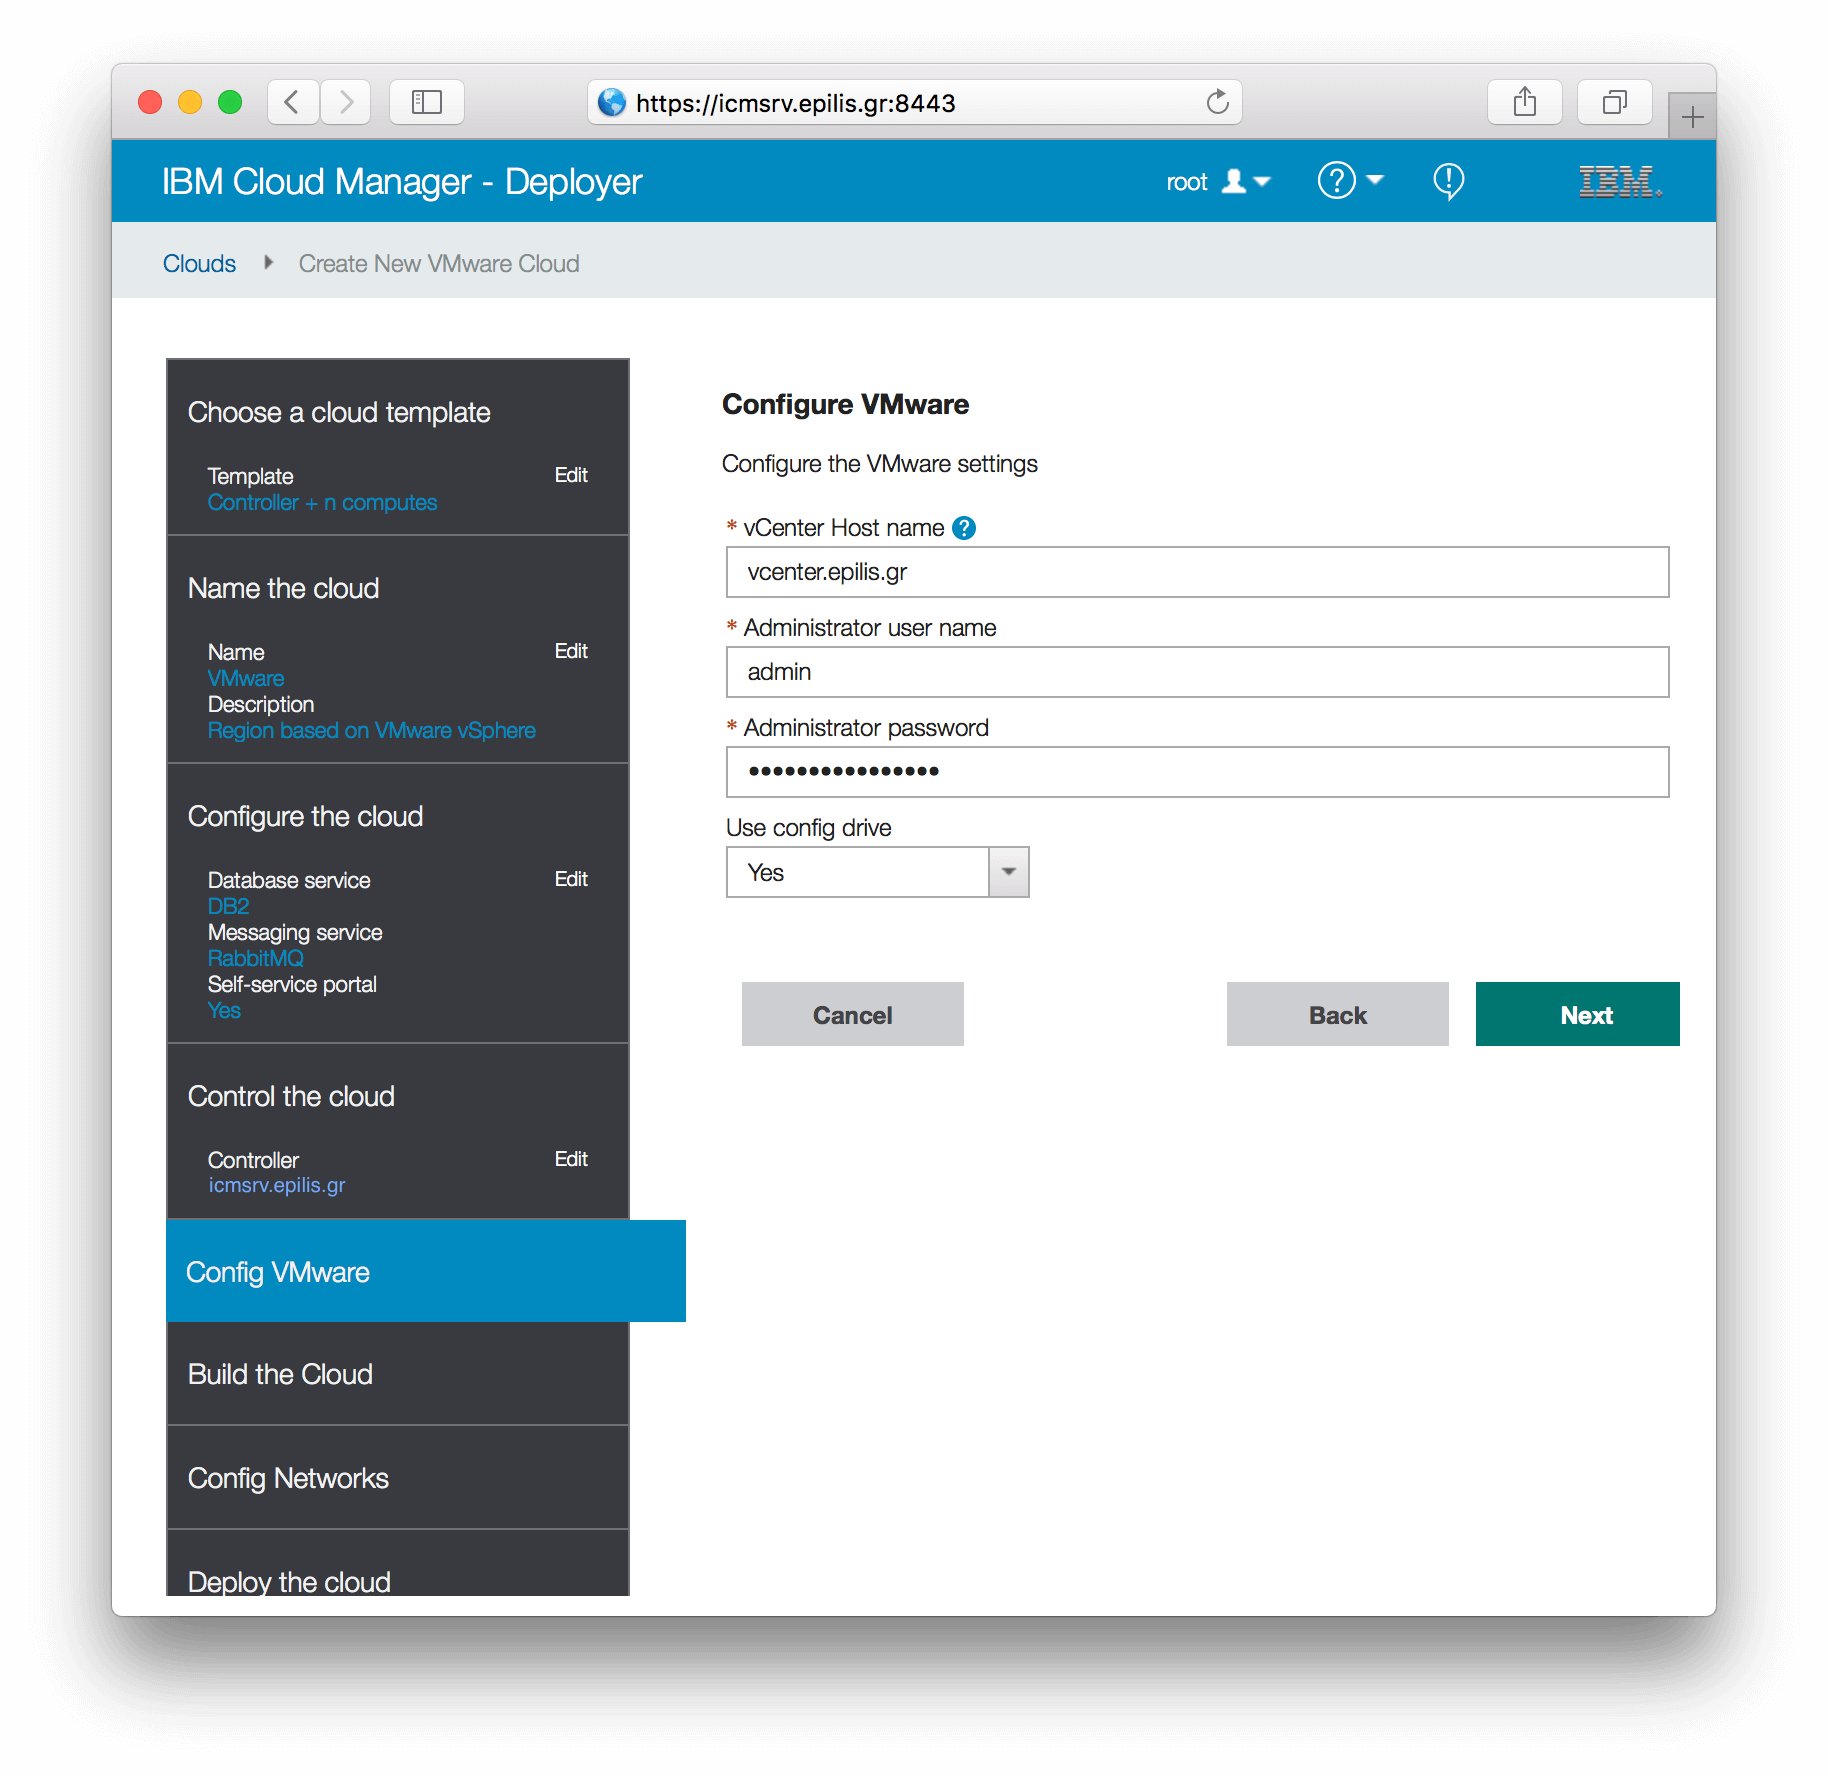
Entrering hypervisor's information:
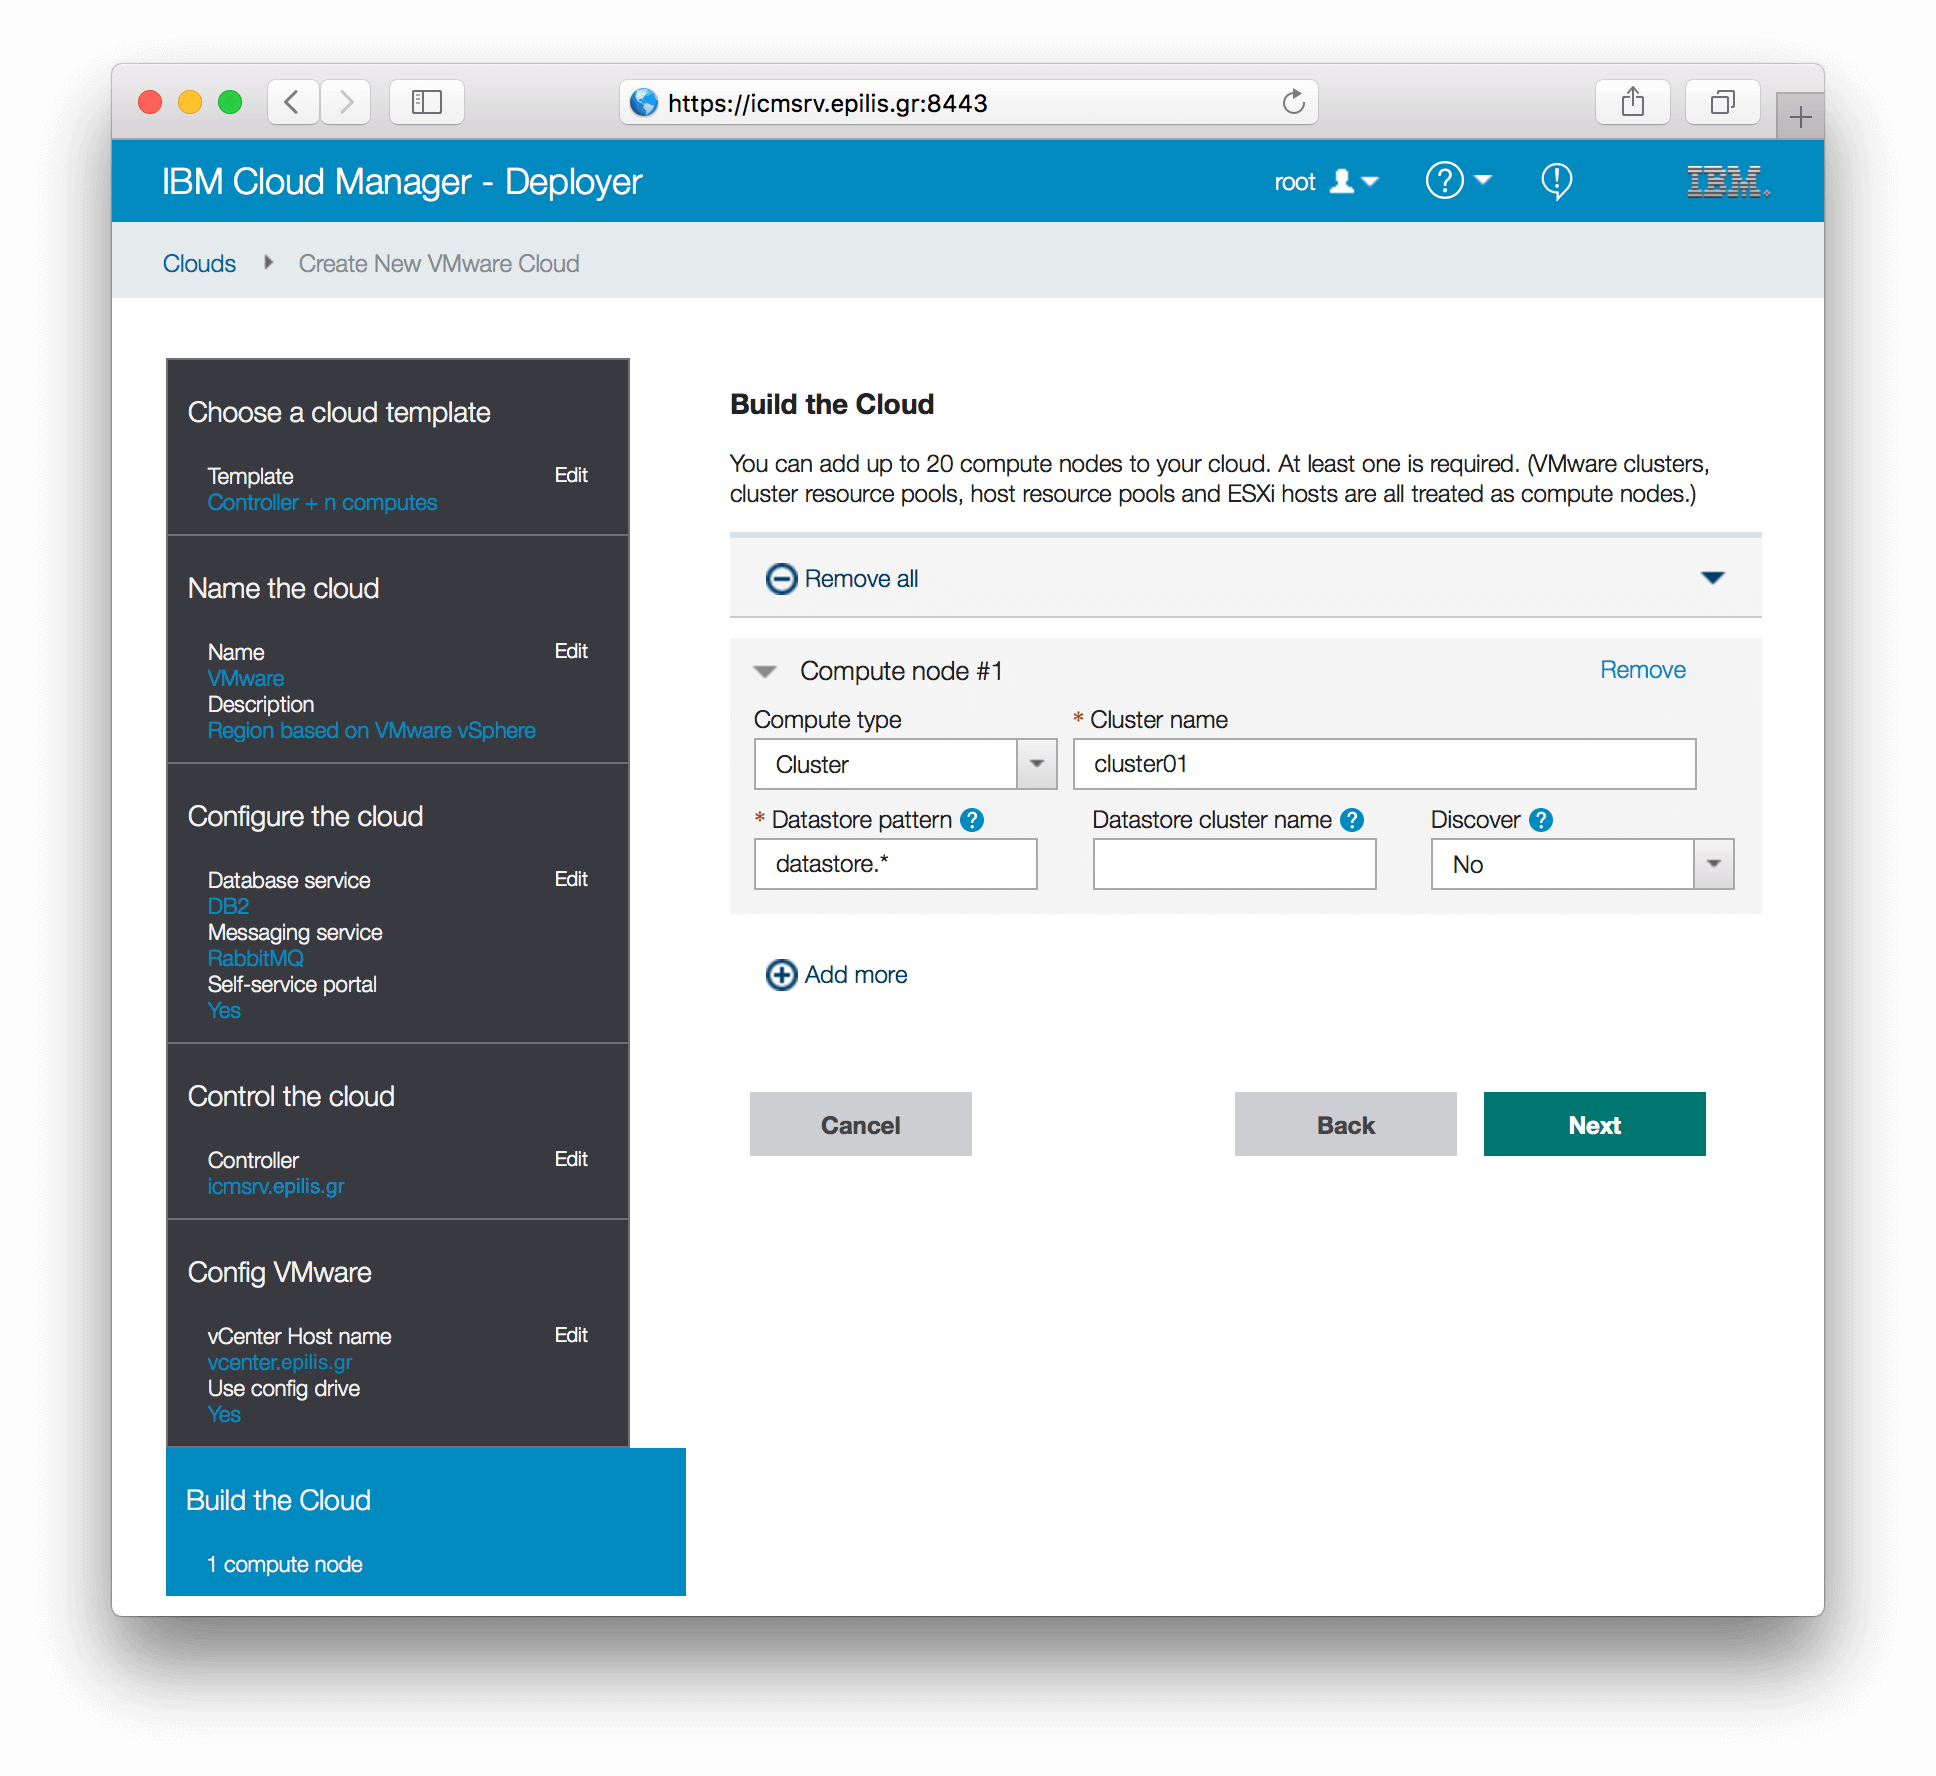
Adding compute nodes:
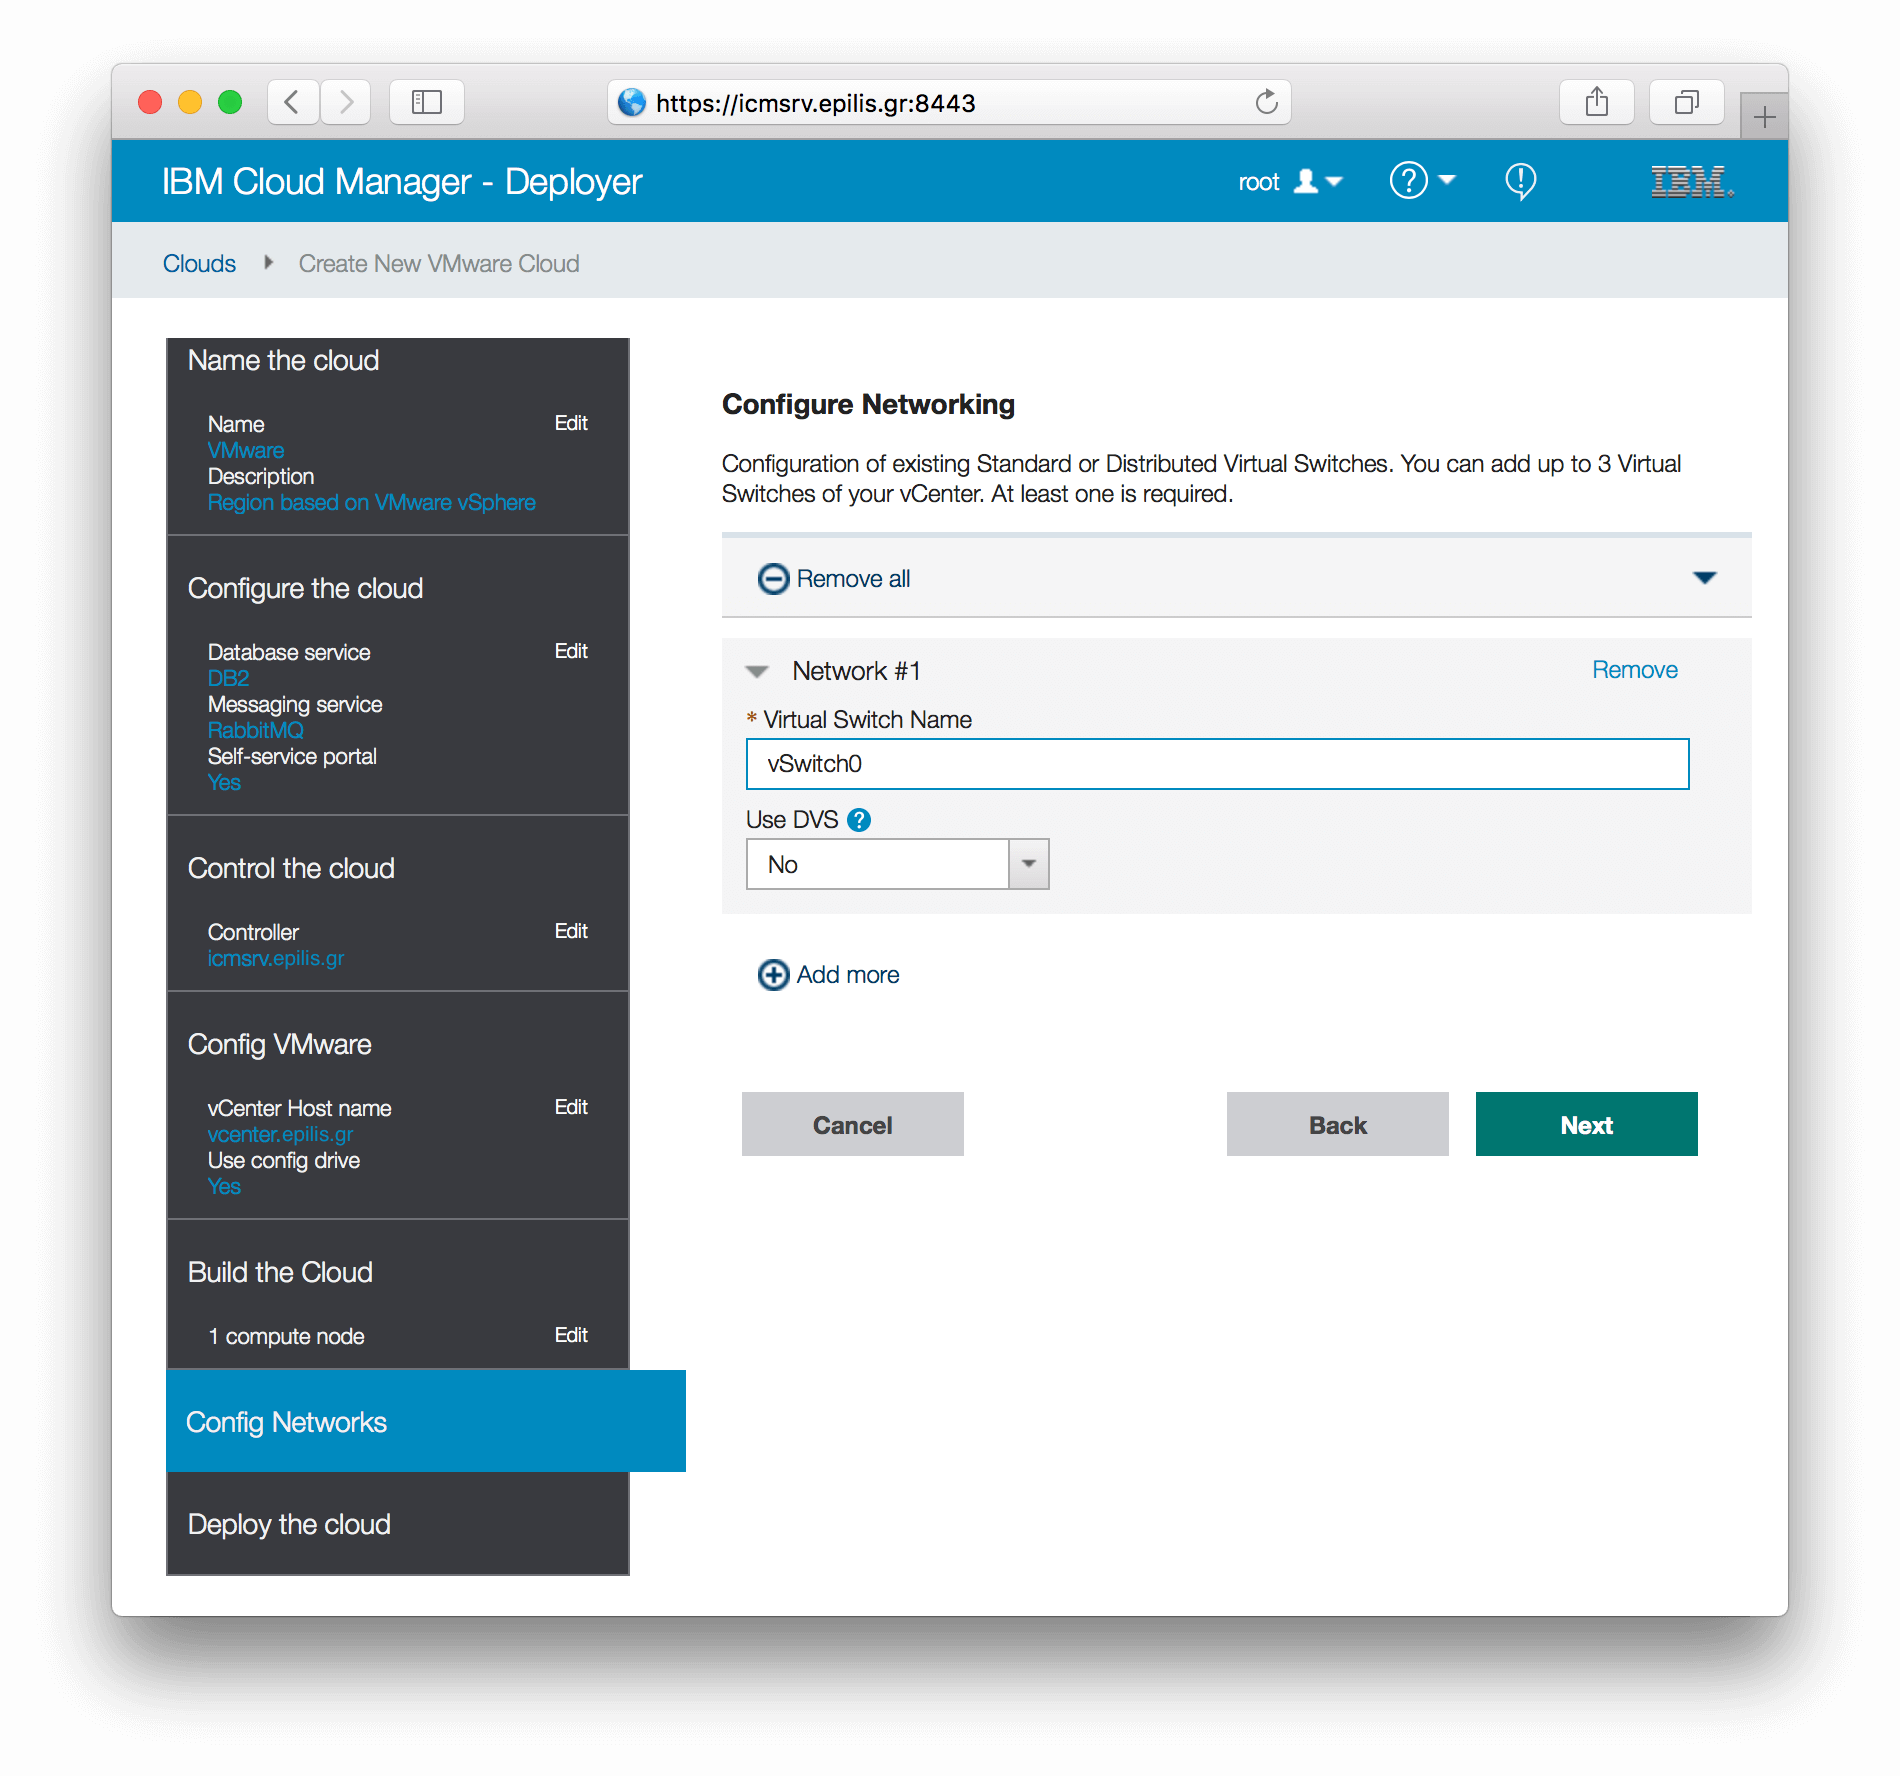
Adding networks:
 Reviewing our Cloud Summary to confirm data entry:
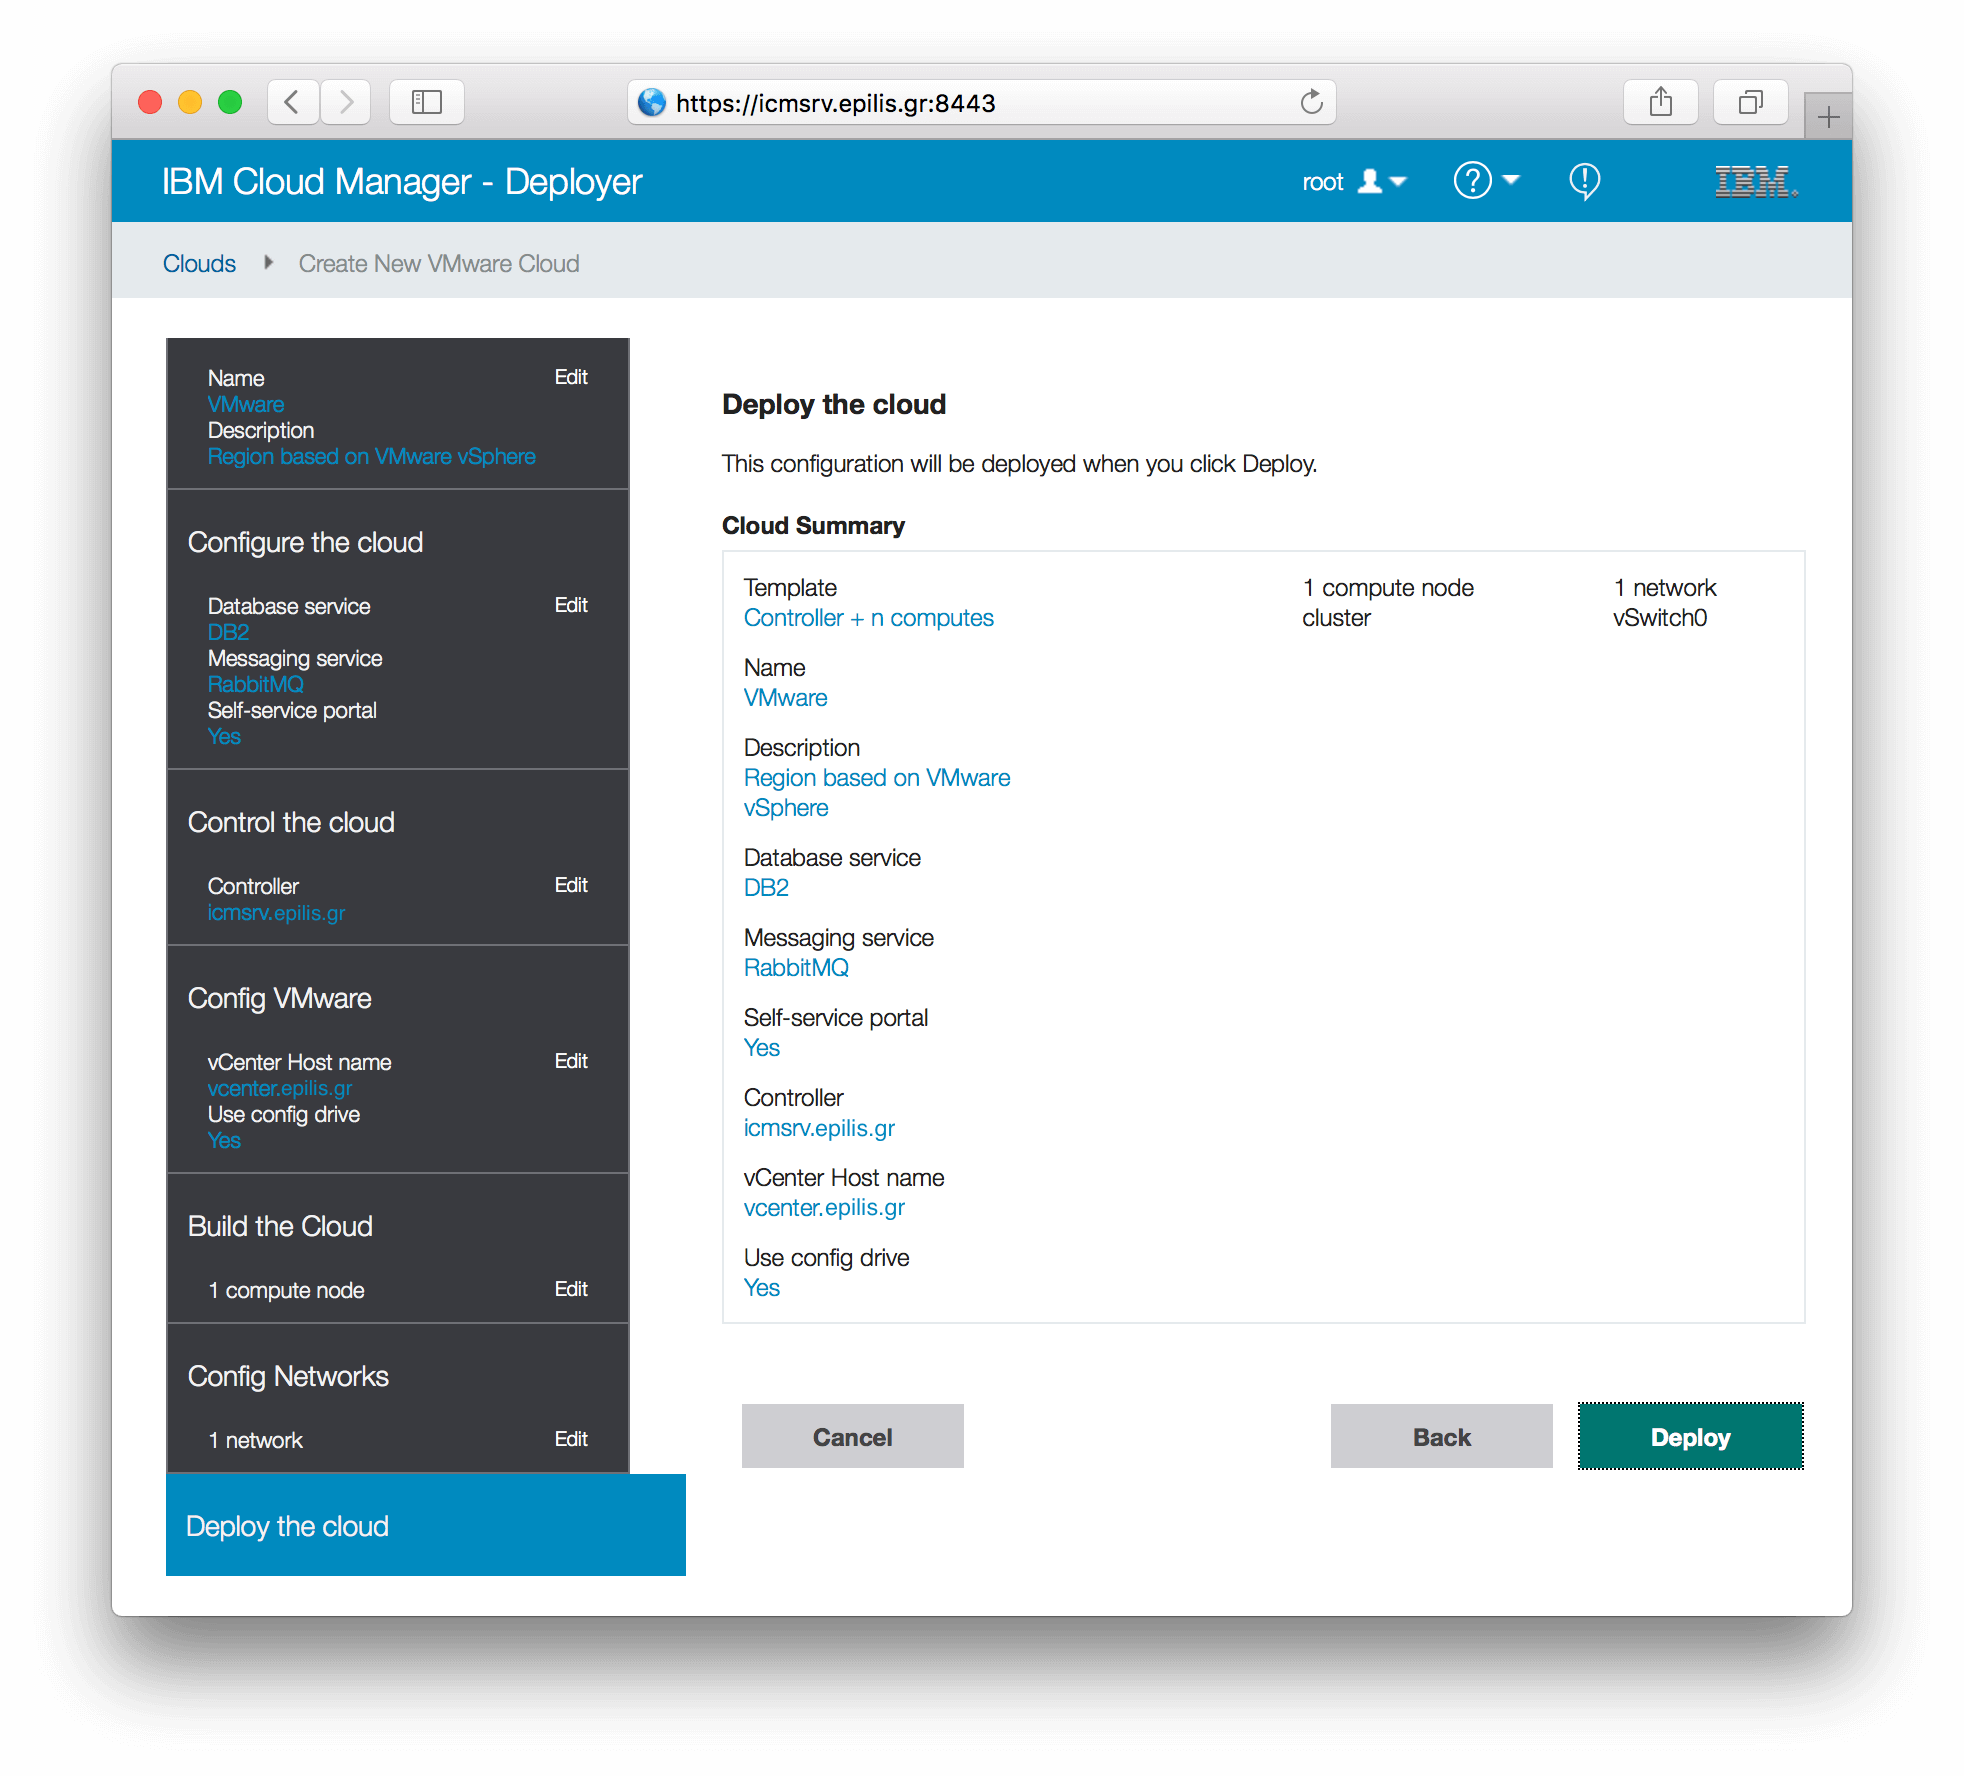
After clicking "Deploy", the Deployer begins a bunch of chef cookbooks that will deploy OpenStack with all the required packages and configuration in our control node (or nodes) and our compute node (or nodes):
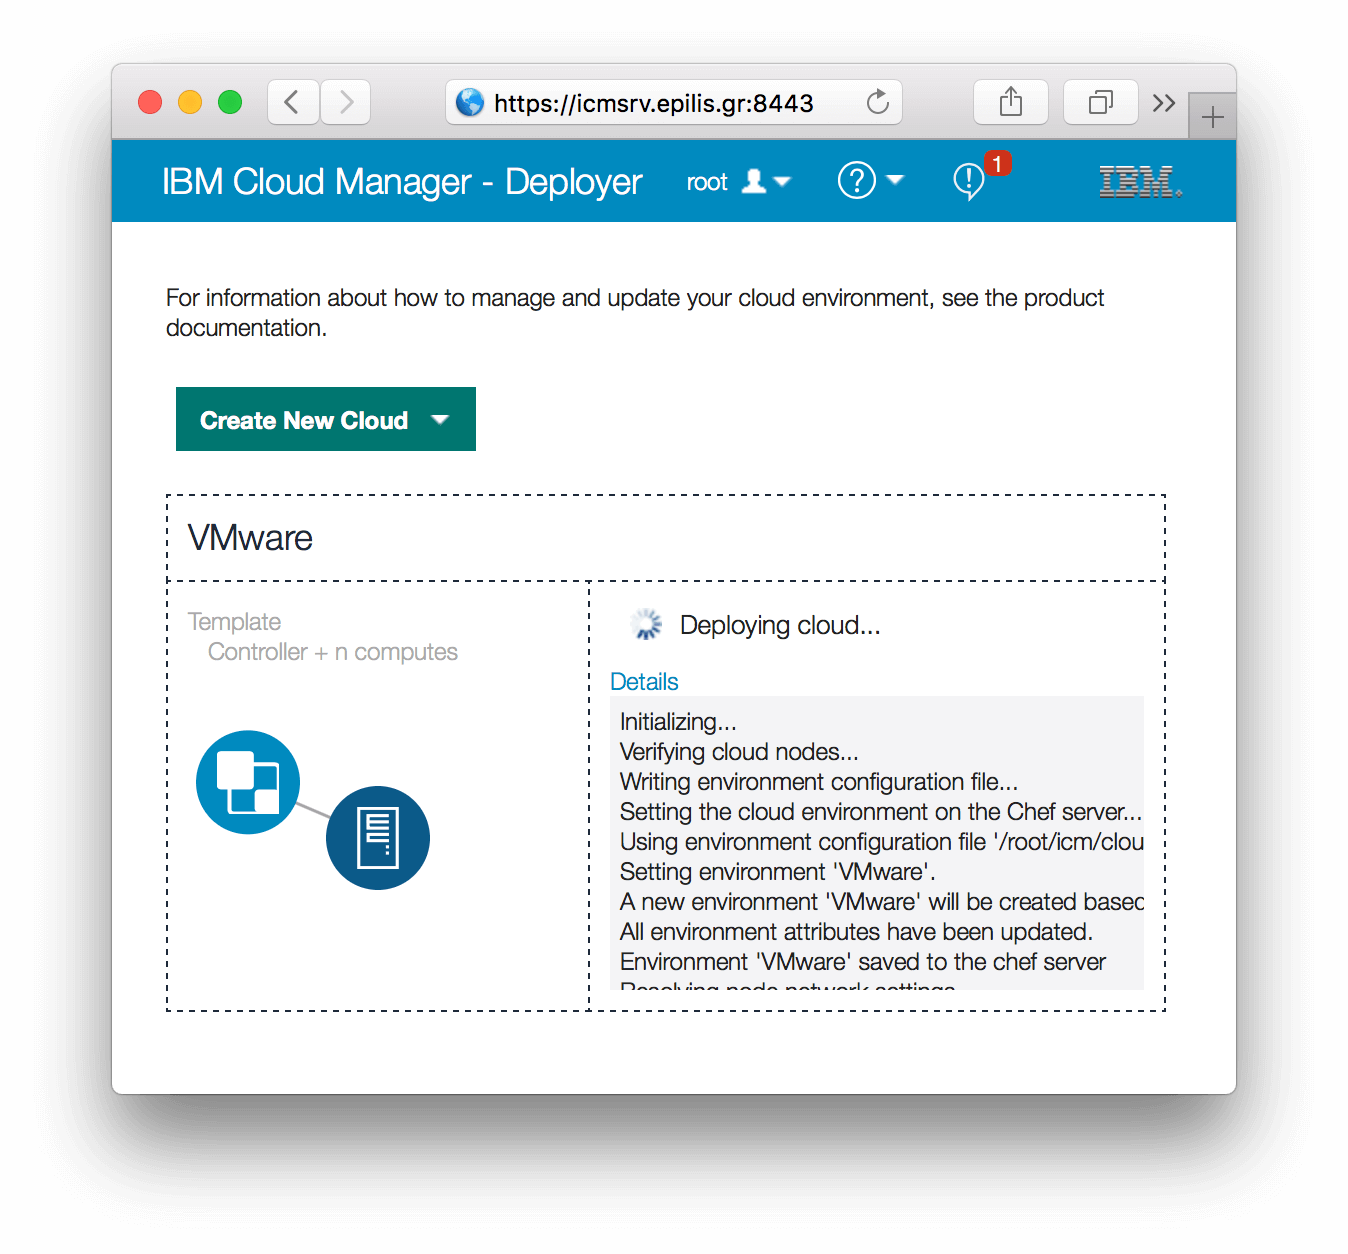
Clicking on "Details" you can watch the orchestrator handling the full configuration including yum repositories, firewall, selinux policies, database for configuration/statistics etc:

In case something goes wrong, it will point you to the log file to handle the error. You can then restart your deployment from the beginning to complete the -non cooked- recipes.
After a successful installation you will end up with a functional OpenStack environment, ready to manage your virtual infrastructure according to the needs of your users. You can access the "Dashboard" on the url:
https://<hostname>
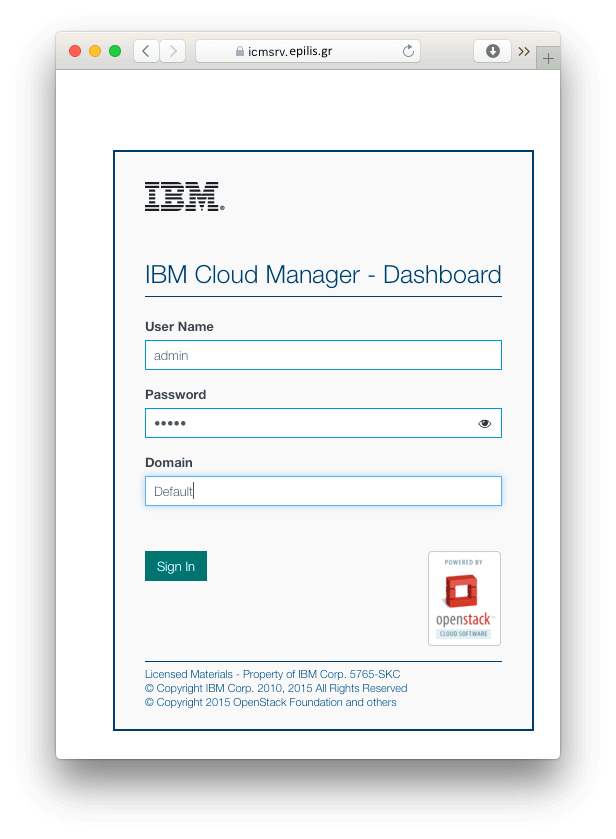
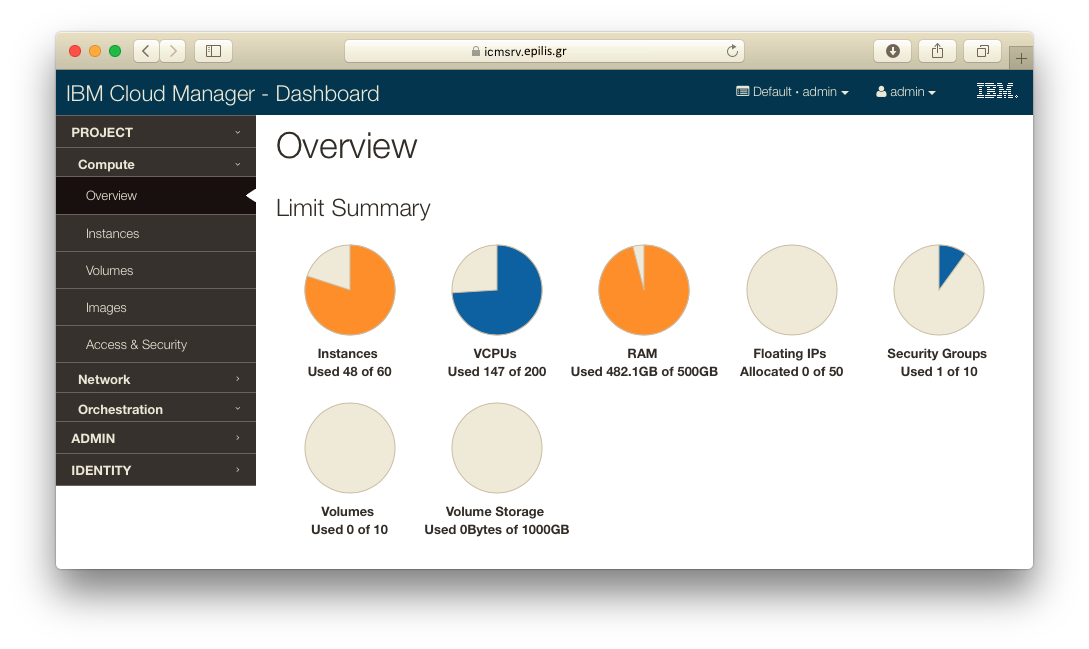
From here, you can monitor and manage your resources. You can create users/groups and assign them to projects with quotas. Users can generate their own authentication keys for logging in instances they create. They have basic instance functionality like start/stop/terminate. They can also use the networks you provide to control connectivity between instances and the whole infrastructure.
Here is a view of your resource usage after some user actions:
On another article we will describe how you can use IBM software to describe and deploy a whole integrated environment of applications/services based on the possibilities that a cloud software like Cloud Manager with OpenStack provides.
- Posted by Kostas KoutsogiannopoulosSept. 1, 2017

