IBM Watson APIs with Django
Building in minutes a Django application that is using IBM Watson APIs to analyse comments.
Introduction
IBM, under the general brand of "Watson", is offering a banch of cloud, Artificial Inteligence services that you can use in two ways:
- Give to your applications the power of cognitive computing
- Analysing structured/unstructure data, comming to conclussions about your business
This article will stay on technical level, demonstrating how you can get started in a few minutes bulding a web application that is using one of those services.
Article's concept
The concept is to build a web application with just one form. The user is writting a comment and submits the form. Then the application is using "Alchemy API" to identify the positive or negative sentiment of user's comment, reporting it to the user with a simple json.
This will only use one of the following 13 functions of the API:
- Entity Extraction
- Sentiment Analysis (this is what we are using)
- Emotion Analysis
- Keyword Extraction
- Concept Tagging
- Relation Extraction
- Taxonomy Classification
- Author Extraction
- Language Detection
- Text Extraction
- Microformats Parsing
- Feed Detection
- Linked Data Support
You can check each one of the links to get informed about the possibilities.
Bluemix registration and your apikey
The first thing you need to do is to create an account . Then you have to login , click on "Watson" and then on "Get started now!" icon.
Click "AlchemyAPI" and create your Credentials with the free pricing plan selected.
You will end up with a JSON like this bellow:
"credentials":{
"url":"https://gateway-a.watsonplatform.net/calls",
"note":"It may take up to 5 minutes for this key to become active",
"apikey":"28ab5b1a1a080b13v130c0145a65f565723fefe6"
}
}
For our API calls in our demo we will only need the "apikey".
Our environment
This will be a rapid development of a basic Django project you may be familiar with. We will describe the process in detail in order to use it for other demonstrations in the future.
Specifically we assoume that you have a linux machine (we are using just a raspberry pi) with python 3 and virtualenv installed.
Create a python virtual environment and activate it:
username@hostname ~$ virtualenv watson_env -p python3
Using base prefix '/usr/local'
New python executable in /home/username/watson_env/bin/python3
Also creating executable in /home/username/watson_env/bin/python
Installing setuptools, pip, wheel...done.
username@hostname ~$ source watson_env/bin/activate
Install watson-developer-cloud library with dependencies:
(watson_env) username@hostname ~$ pip install watson-developer-cloud
Collecting pysolr<4.0,>=3.3 (from watson-developer-cloud)
Using cached pysolr-3.5.0-py2.py3-none-any.whl
Collecting requests<3.0,>=2.0 (from watson-developer-cloud)
Using cached requests-2.10.0-py2.py3-none-any.whl
Installing collected packages: requests, pysolr, watson-developer-cloud
Successfully installed pysolr-3.5.0 requests-2.10.0 watson-developer-cloud-0.18.0
Install Django:
(watson_env) username@hostname ~$ pip install Django
Downloading Django-1.9.8-py2.py3-none-any.whl (6.6MB)
100% |--------------------------------| 6.6MB 25kB/s
Installing collected packages: Django
Successfully installed Django-1.9.8
Creating the project
Start a new django project:
(watson_env) username@hostname ~$ django-admin startproject watson_project
Make database migrations:
(watson_env) username@hostname ~/watson_project$ python manage.py migrate
Apply all migrations: contenttypes, sessions, admin, auth
Running migrations:
Rendering model states... DONE
Applying contenttypes.0001_initial... OK
Applying auth.0001_initial... OK
Applying admin.0001_initial... OK
Applying admin.0002_logentry_remove_auto_add... OK
Applying contenttypes.0002_remove_content_type_name... OK
Applying auth.0002_alter_permission_name_max_length... OK
Applying auth.0003_alter_user_email_max_length... OK
Applying auth.0004_alter_user_username_opts... OK
Applying auth.0005_alter_user_last_login_null... OK
Applying auth.0006_require_contenttypes_0002... OK
Applying auth.0007_alter_validators_add_error_messages... OK
Applying sessions.0001_initial... OK
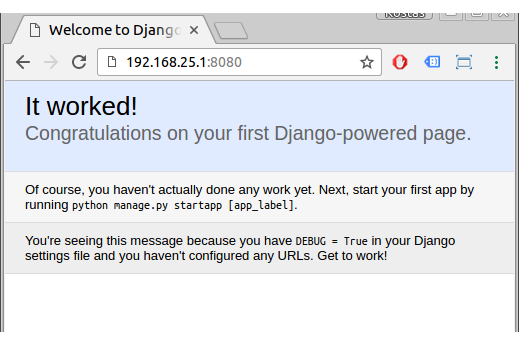
Run your development server (ignore the IP:port that fits to my envorinment):
(watson_env) username@hostname ~/watson_project$ python manage.py runserver 192.168.25.1:8080
...and point your browser to this url:
http://192.168.25.1:8080
Bulding the App
Now it is time for some real work. Create a new django application:
(watson_env) username@hostname ~/watson_project$ python manage.py startapp watson_app
Go to your settings.py file and add the new application and the apikey as a setting:
~/watson_project/watson_project/settings.py# ... # Application definition INSTALLED_APPS = [ 'django.contrib.admin', 'django.contrib.auth', 'django.contrib.contenttypes', 'django.contrib.sessions', 'django.contrib.messages', 'django.contrib.staticfiles', 'watson_app', ] # APIKEY = '28ab5b1a1a080b13v130c0145a65f565723fefe6'
Now create the form:
~/watson_project/watson_app/forms.pyfrom django import forms from django.http import HttpResponse from django.conf import settings # Watson dependencies import json from os.path import join, dirname from watson_developer_cloud import AlchemyLanguageV1 # Getting APIKEY variable from settings APIKEY = getattr(settings, "APIKEY", None) # Watson authentication alchemy_language = AlchemyLanguageV1(api_key=APIKEY) class CommentForm(forms.Form): comment = forms.CharField( label="Comment", widget=forms.Textarea(attrs={'rows': 10}), required=True) def ask_watson(self): text = self.cleaned_data['comment'] combined_operations = ['doc-sentiment'] return alchemy_language.combined(text=text, extract=combined_operations)
...the view:
~/watson_project/watson_app/views.pyfrom django.shortcuts import render from django.http import HttpResponse import json # Create your views here. from django.views.generic.edit import FormView from watson_app.forms import CommentForm class CommentView(FormView): template_name = 'comment.html' form_class = CommentForm success_url = '.' def form_valid(self, form): serialized_json = json.dumps(form.ask_watson() , sort_keys=True, indent=4) return HttpResponse(serialized_json, content_type="application/json")
...the html template:
~/watson_project/watson_app/templates/comment.html<div class="row"> <div class="col s12"> <h3>Comment</h3> <form action="" method="post">{% csrf_token %} {{ form.as_p }} <button class="btn waves-effect waves-light" type="submit" name="action">Submit <i class="mdi-content-send right"></i> </button> </form> </div> </div>
...and add to your urls.py the pattern for your view:
~/watson_project/watson_project/urls.py# ....
urlpatterns = [
url(r'^admin/', admin.site.urls),
url(r'^watson/', CommentView.as_view(), name='comment'),
]
Testing
The application is ready to go. Run your server (again ignore the IP:port):
(watson_env) username@hostname ~/watson_project$ python manage.py runserver 192.168.16.12:8080
... and give the url http://192.168.16.12:8080/watson to your users for some testing.
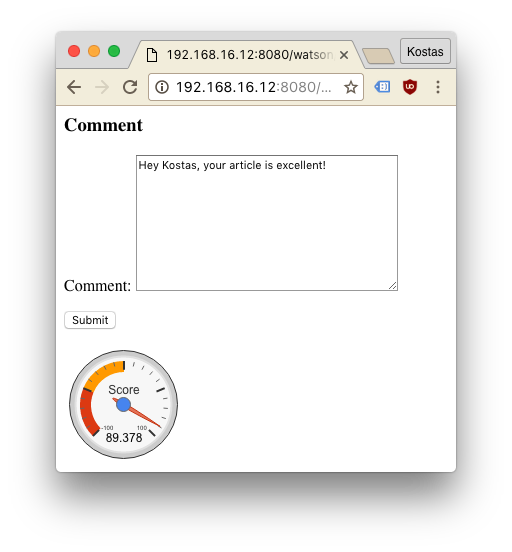
For example this comment:
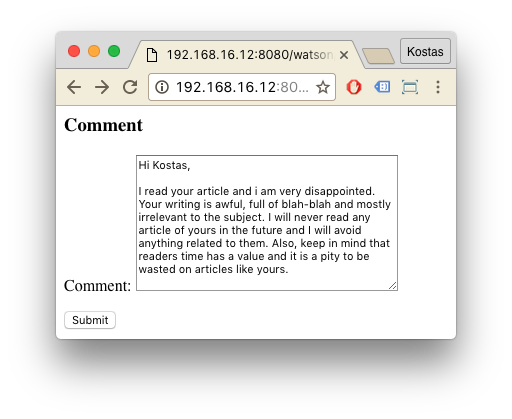
...gives the following answer:
{
    "docSentiment": {
        "mixed": "1",
        "score": "-0.492867",
        "type": "negative"
    },
    "language": "english",
    "status": "OK",
    "usage": "By accessing AlchemyAPI or using information generated by AlchemyAPI, you are agreeing to be bound by the AlchemyAPI Terms of Use: http://www.alchemyapi.com/company/terms.html"
}
This comment though:
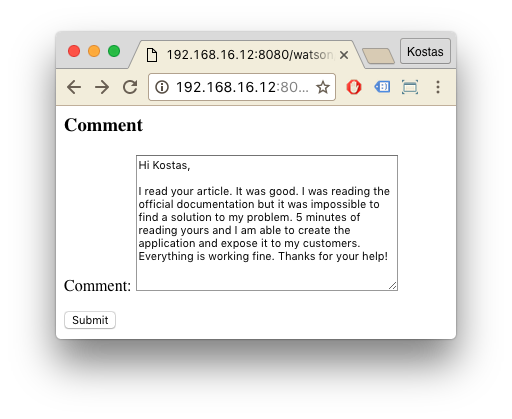
...gives another answer:
{
    "docSentiment": {
        "score": "0.697192",
        "type": "positive"
    },
    "language": "english",
    "status": "OK",
    "usage": "By accessing AlchemyAPI or using information generated by AlchemyAPI, you are agreeing to be bound by the AlchemyAPI Terms of Use: http://www.alchemyapi.com/company/terms.html"
}
Beautify
Now lets use Google Charts to beautify the response.
Edit your view to extract the score from Watson response and add it as 'score' variable to the context dictionary:
~/watson_project/watson_app/views.py
from django.template.response import TemplateResponse
from django.shortcuts import render
from django.http import HttpResponse, HttpResponseNotFound
from django.http import JsonResponse
import json

# Create your views here.
from django.views.generic.edit import FormView
from watson_app.forms import CommentForm


class CommentView(FormView):
    template_name = 'comment.html'
    form_class = CommentForm
    success_url = '.'

    def form_valid(self, form):
        watsonresponse = form.ask_watson()
        score = float(watsonresponse['docSentiment']['score']) * 100
        context = self.get_context_data()
        context['score'] = score
        return render(self.request, 'comment.html', context)
Your new template:
~/watson_project/watson_app/templates/comment.html<html> <body> <div class="row"> <div class="col s12"> <h3>Comment</h3> <form action="" method="post">{% csrf_token %} {{ form.as_p }} <button class="btn waves-effect waves-light" type="submit" name="action">Submit <i class="mdi-content-send right"></i> </button> </form> </div> </div> <script type="text/javascript" src="https://www.gstatic.com/charts/loader.js"></script> <div id="chart_div" style="width: 400px; height: 120px;"></div> <script> google.charts.load('current', {'packages':['gauge']}); google.charts.setOnLoadCallback(drawChart); function drawChart() { var score = {{ score }} var data = google.visualization.arrayToDataTable([ ['Label', 'Value'], ['Score', score] ]); var options = { width: 400, height: 120, redFrom: -100, redTo: -50, yellowFrom:-50, yellowTo: 0, minorTicks: 5, min: -100 }; var chart = new google.visualization.Gauge(document.getElementById('chart_div')); chart.draw(data, options); } </script> </body> </html>
Enjoy:
Trying to fool it:
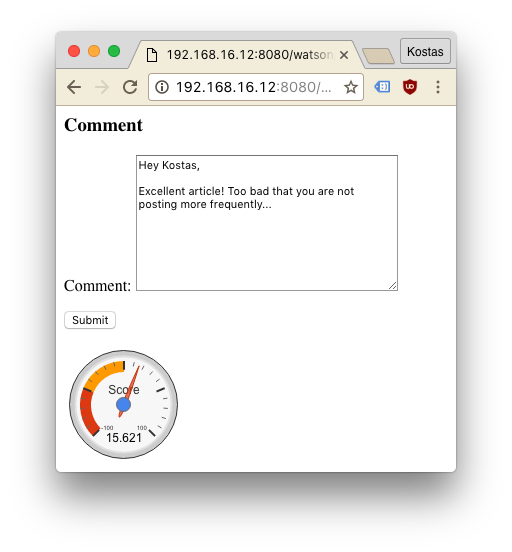
Keep in mind that Watson is getting smarter every day. ;)
- Posted by Kostas KoutsogiannopoulosAug. 18, 2016

